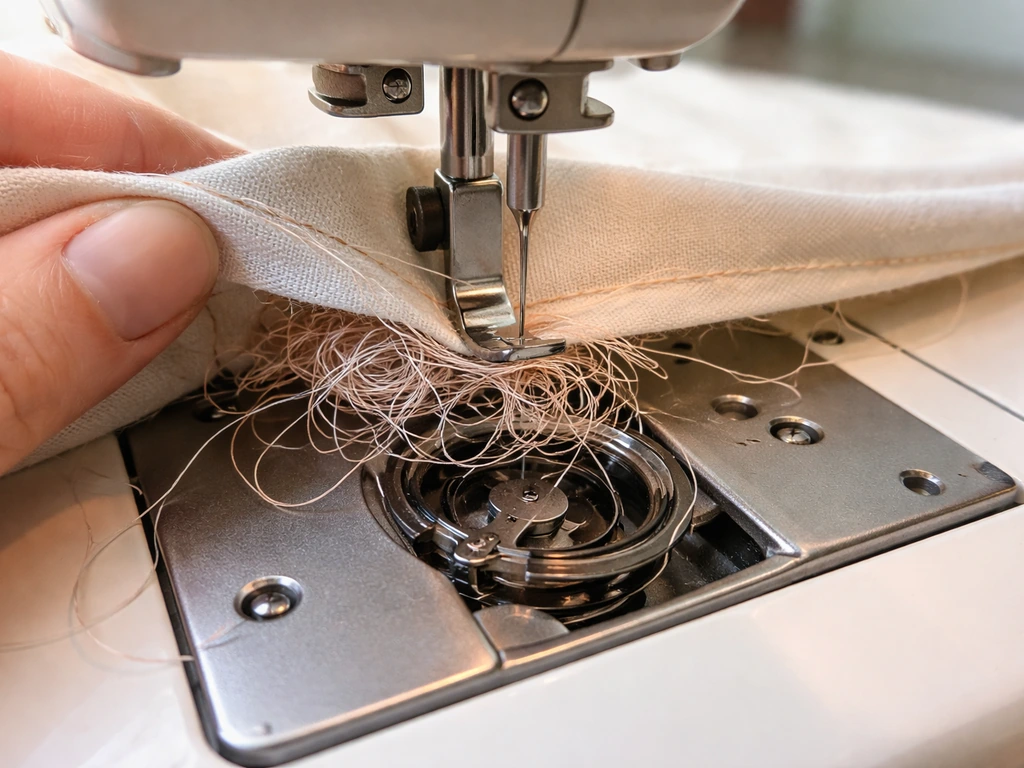
Bird nesting in embroidery happens when the top thread and bobbin thread aren't interacting the way they're supposed to, so instead of forming a clean stitch inside the fabric layers, thread piles up in a tangled clump, usually on the underside of the fabric or at the start of a seam. The fix almost always comes down to one of four things: threading errors, tension imbalance, mechanical timing problems, or a mismatch between your needle, thread, and fabric. Here's how to pinpoint the exact cause and stop it fast.
What Causes Bird Nesting in Embroidery and How to Fix It

Maya Bennett
18 Apr 2026

Why bird nesting happens: the root causes
The term 'bird nesting' describes the tangle of looped thread that builds up on the underside (or occasionally the top surface) of your fabric when stitches fail to lock properly. On an embroidery machine, this usually shows up as a dense clump beneath the hoop at the start of a design. On a sewing machine, it tends to appear at the very beginning of a seam. Either way, the cause is the same at a mechanical level: the top thread is not being controlled correctly, so it runs wild instead of being pulled down into the fabric to meet the bobbin thread at the right moment.
The most common root causes, roughly in order of how often they actually appear in practice, are: incomplete or incorrect top threading, bobbin inserted or wound incorrectly, top or bobbin tension out of balance, debris and lint buildup in the hook area, a needle that is bent, dull, or wrong for the job, and (less commonly) a machine timing problem. Start at the top of that list and work down. You'll solve it faster that way than diving straight into tension adjustments.
Threading, tension, and bobbin setup: where most problems live
Threading the top correctly
This is the number one cause of bird nesting, and it's also the easiest to overlook because the machine can look threaded without actually being threaded through every guide. Singer's troubleshooting guidance calls out two specific things: blank" rel="noopener noreferrer">raise the presser foot lifter and raise the needle to its highest position before you thread. Why does this matter? The tension discs only open and accept thread when the presser foot is raised. If you thread with the foot down, the thread sits beside the discs instead of between them, and you get zero top tension, which guarantees a nest. Thread with the foot up, seat the thread completely through every guide in order, and make sure it's fully seated in the take-up lever. Once you've started sewing, also pull both the top and bobbin threads back under the presser foot before you begin your first stitch, because threads left dangling in front are a classic cause of that tangle at the very start of a seam.
Loading and winding the bobbin
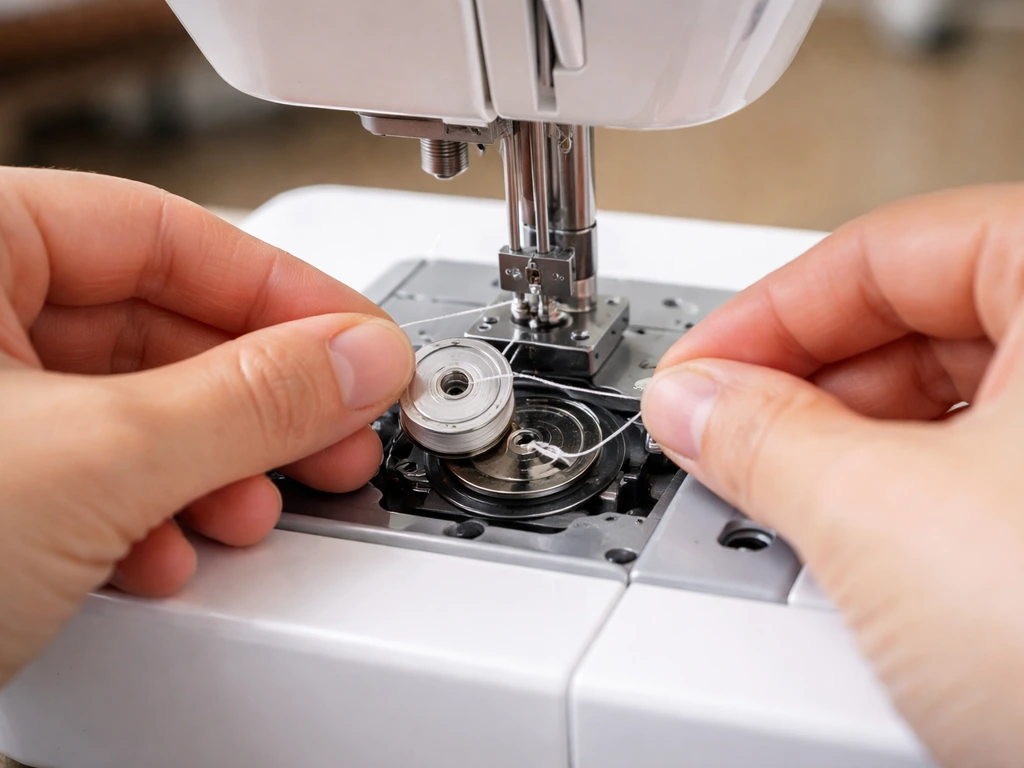
Bobbin errors are the second most common cause. Janome's troubleshooting guidance specifically flags two failure points: the direction the bobbin unwinds and whether the thread has been pulled through both notches in the bobbin case. Both matter. If the bobbin unwinds the wrong direction, tension is inconsistent. If the thread misses a notch in the case, you effectively have no bobbin tension at all, and the top thread has nothing to pull against, so it loops and pools underneath the fabric.
Ricoma's troubleshooting for bird nesting adds a quick physical check: pull the bobbin thread out by hand. It should come out with ease, meaning smooth resistance, not bound tight and not free-spinning with no resistance at all. If it pulls out freely with no tension, the thread isn't routed through the tensioning path of the bobbin case correctly. If it won't budge, the case tension is too tight. Brother's tension reference also notes that bobbin case tension should be checked at installation and at every bobbin change, so don't treat it as a set-and-forget setting.
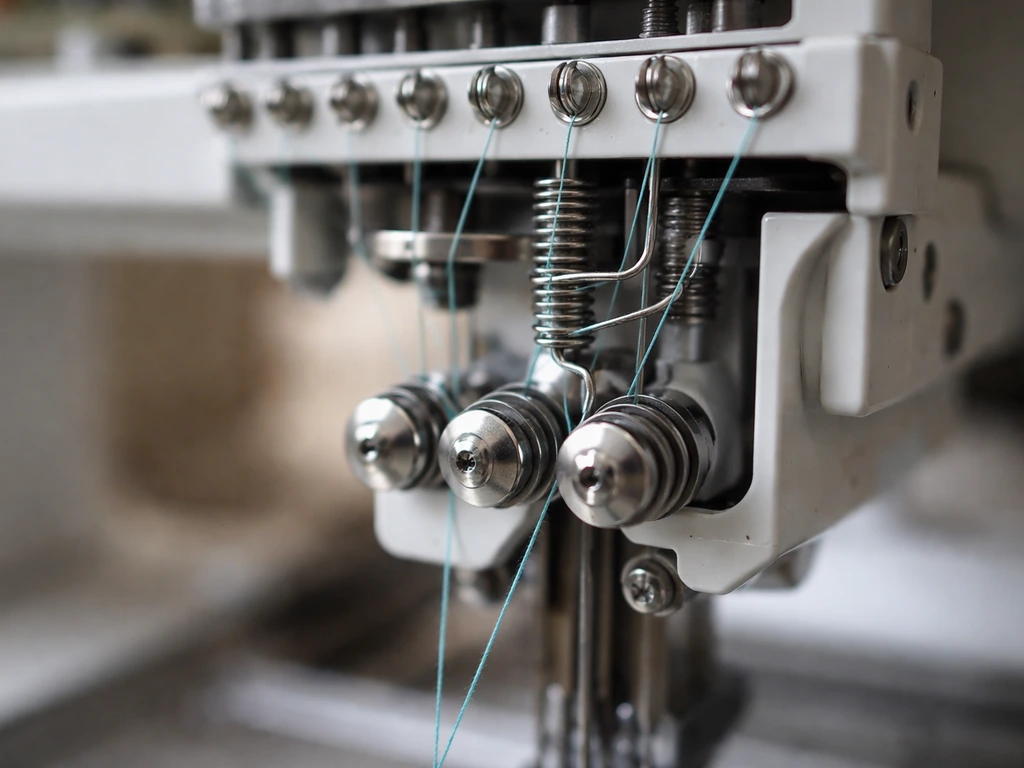
Balancing top and bobbin tension
Tension is a relationship between two threads, not a single dial setting. Janome's Quilt Maker manual recommends a specific adjustment order: set bobbin tension first, then adjust top tension to match. BERNINA's troubleshooting documentation lists 'bobbin tension too loose' as a direct cause of excessive thread nesting on the underside. Ricoma describes the diagnostic symptom clearly: if the top thread is looping on the bottom, top tension is too low or bobbin tension is too high. If bobbin thread is showing on top, the relationship is reversed.
For embroidery setups specifically, thread weight matters a lot for getting tension right. Brother recommends 40 to 50-weight thread on top and 60-weight in the bobbin for many of their embroidery configurations. Using heavier thread than the machine is calibrated for will cause tension problems that no dial adjustment will fully correct. The fix starts with using the right thread, not cranking the tension.
To test bobbin tension the old-fashioned way: hold the end of the bobbin thread and let the bobbin case hang suspended. It should hold its position or drop only very slightly with a sharp jerk. Janome's professional-series manuals describe this exact test. If the case drops freely, tension is too loose. If it won't drop at all with a firm jerk, tension is too tight. This gives you a reliable baseline before you touch the top tension.
Bobbin thread tail length on embroidery machines
One detail that's easy to miss on embroidery machines specifically: Brother's industrial guidance specifies that after a trim, the bobbin thread tail should be even with, or about 3/8 inch below, the bottom of the presser foot. Tails that are too long get caught at the start of the next color change and contribute directly to nesting at the beginning of a new run.
Timing and mechanical issues inside the machine
If you've rethreaded everything correctly, checked the bobbin, and balanced tension, but bird nesting keeps happening, you're likely looking at a mechanical problem. The most relevant one is machine timing. The hook (the rotating part that catches the top thread loop and pulls it around the bobbin) has to catch that loop at a precise moment in the needle's stroke. If timing is off, even slightly, the hook misses the loop or catches it late, the thread doesn't lock, and you get a tangle. If your top thread loop is not being caught at the right time, you can end up with top thread bird nesting under fabric. Singer's FAQ explicitly connects timing disruption to skipped stitches and thread formation failures.
Timing can drift if a needle breaks inside the machine and the broken piece strikes the hook, or if the machine has been run hard without servicing. This is not a user-adjustable fix on most home and mid-range machines. If you suspect timing, take the machine to a technician. You can confirm the suspicion first by checking whether the problem persists across multiple threads, needles, and fabrics with correct setup. If it does, timing or a damaged hook are the likely culprits. If you need a clear, step-by-step approach for how to fix bird nesting on a sewing machine, focus on timing first after threading, bobbin setup, and tension check out.
Also check the anti-spin spring on the bobbin case if your machine has one. Brother's thread tension documentation highlights this component as part of the correct tension baseline. If this spring is bent or missing, the bobbin can rotate more freely than it should, reducing effective bobbin tension and causing loops.
Needle, thread, and fabric: compatibility problems that cause nesting
Using the wrong needle for the job is a surprisingly common cause of bird nesting, and it's one that gets overlooked because the machine still runs. Brother Canada's needle guidance recommends a size 75/11 needle for standard embroidery work. Using a needle that's too small for a heavy fabric or thick thread means the needle can't create a large enough hole for the thread to pass cleanly, which disrupts stitch formation and can cause the thread to loop instead of interlocking. A needle that's bent even slightly will cause the same problem because it arrives at the hook a fraction off-position.
Needle insertion is also critical. Singer specifically warns that incorrect needle insertion (not fully seated, turned the wrong way) prevents the needle from correctly pulling up the bobbin thread. The flat side of the needle shank should face the back of most machines, and the needle should be pushed all the way up into the clamp before tightening. A needle that's dropped even 1mm too low changes the geometry of how the hook catches the thread loop.
| Variable | What causes nesting | Fix |
|---|---|---|
| Needle size | Too small for thread/fabric weight; causes poor stitch formation | Use 75/11 for embroidery; size up for heavier fabrics and threads |
| Needle condition | Bent or dull needle misses the hook's catch window | Replace needle every 8 hours of use or at the start of each project |
| Needle insertion | Not fully seated or wrong orientation disrupts loop pick-up | Seat fully, flat side back, tighten clamp firmly |
| Top thread weight | Too heavy or too light for machine's tension calibration | Use 40–50 weight for embroidery top thread |
| Bobbin thread weight | Wrong weight creates unresolvable tension imbalance | Use 60–90 weight bobbin thread for embroidery setups |
| Fabric thickness | Heavy fabric with thin needle or fine thread causes drag and loops | Match needle size and thread weight to fabric weight |
| Stabilizer | Too little stabilizer lets fabric shift, disrupting stitch formation | Use appropriate stabilizer type and weight for the design and fabric |
Stabilizer choice matters on embroidery machines in particular. If the fabric shifts even slightly in the hoop during stitching, the relationship between the needle, hook, and thread loop is disrupted. The result looks like bird nesting but is actually a symptom of inadequate hooping or wrong stabilizer for the design density. If your nesting only happens with dense designs or stretchy fabrics, this is the first place to look.
Machine maintenance and how to troubleshoot step by step
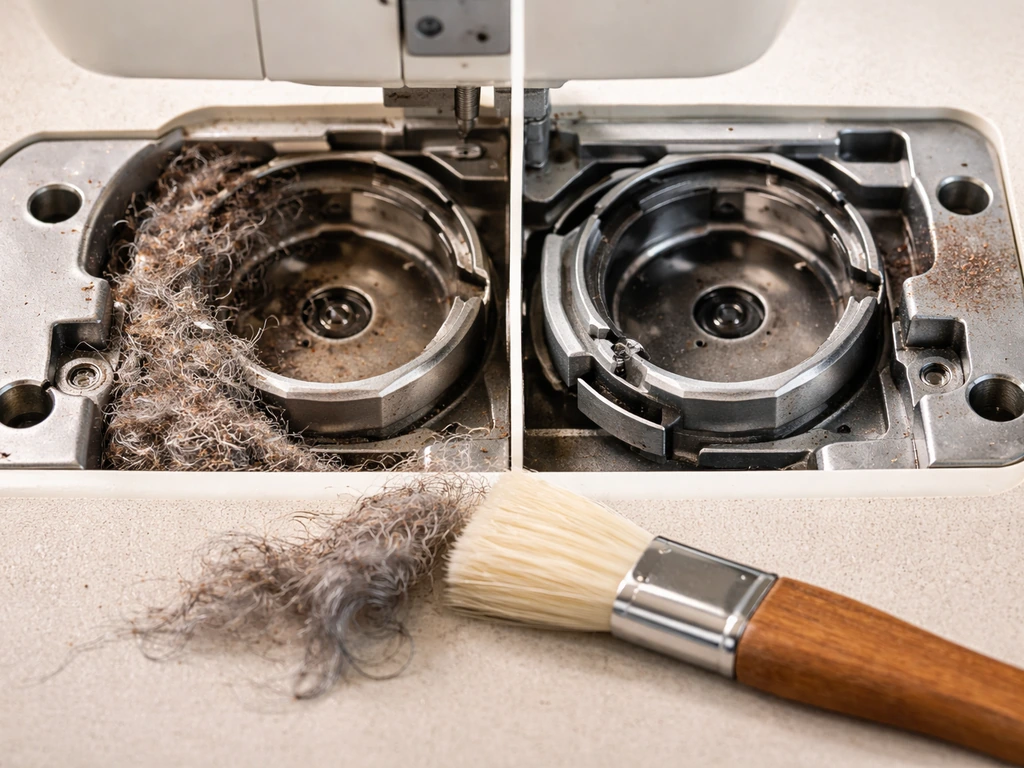
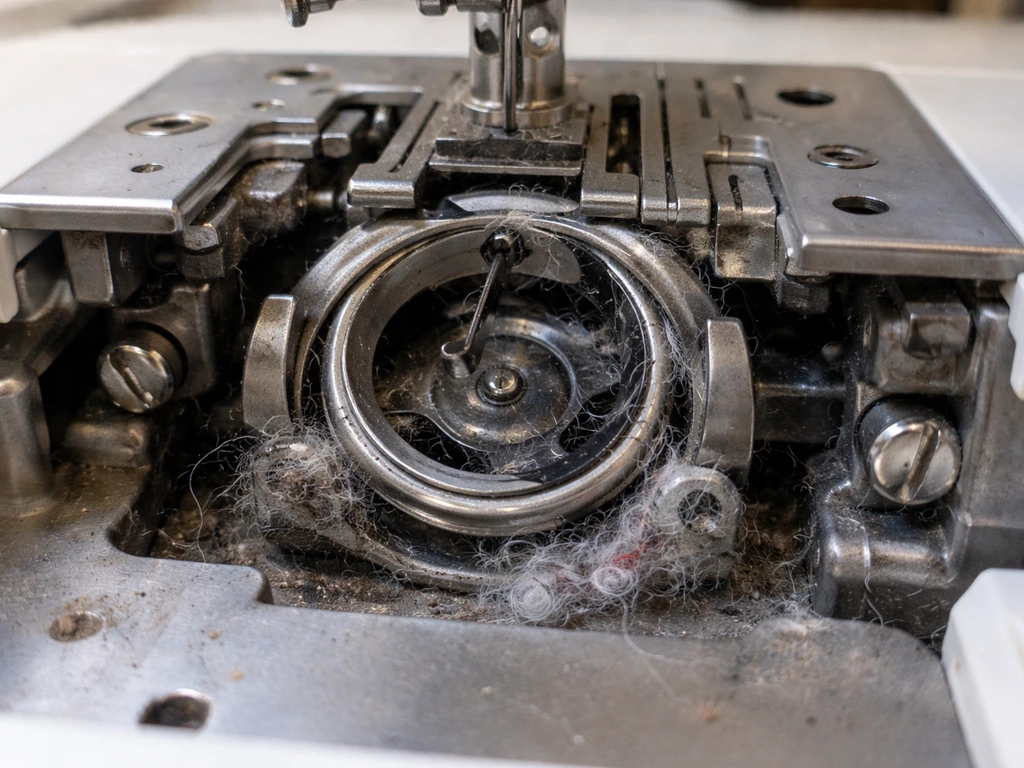
Lint and thread debris in the hook area is one of the most underestimated causes of bird nesting. The rotary hook area collects lint from every project, and that buildup changes the clearance around the bobbin case, creates friction on the bobbin thread, and can catch passing thread loops. Brother Europe lists cleaning the bobbin area as a daily priority for commercial embroidery machines. Janome recommends cleaning the hook area at least once a month for home machines, and BERNINA recommends cleaning and oiling every other bobbin change, or about every 3 to 4 hours of actual sewing. That's a much more frequent interval than most people follow.
To clean properly: remove the bobbin and bobbin case, use a lint brush or short burst of canned air to clear the hook race and surrounding area, and look for any thread remnants wrapped around the hook. Brother's service guidance specifically calls out cleaning all dust and thread remnants from around the rotary hook and thread guide areas as part of the routine bobbin-area service.
Here's a practical troubleshooting sequence to run through the next time bird nesting appears. Work in this order and stop as soon as the problem resolves.
- Raise the presser foot and raise the needle to its highest position. Completely rethread the top from scratch, making sure thread seats between the tension discs and fully engages the take-up lever.
- Remove the bobbin and bobbin case. Clean all lint from the hook race with a brush. Inspect for thread wrapped around the hook shaft.
- Reinsert the bobbin with thread unwinding in the correct direction for your machine. Route the thread through both notches in the bobbin case. Pull the thread by hand: it should slide out with smooth, light resistance.
- Pull both top and bobbin threads back under and behind the presser foot before starting a test stitch.
- Sew a short test line on scrap fabric of the same weight as your project. Check both sides for loops.
- If nesting continues, check the needle: remove it, inspect for any visible bend, and replace it. Reinsert it fully with the flat side toward the back.
- Check thread and needle compatibility against the fabric weight. Switch to the correct weight if needed.
- If the problem persists after all of the above, test on a different fabric and thread combination. If it still nests, suspect a mechanical issue (hook damage, timing) and take the machine in for servicing.
Also check the spool pin orientation. Thread that unwinds from the wrong angle on the spool pin creates irregular tension in the thread path before it even reaches the tension discs. Most machines specify whether thread should come off the top of the spool or the side, and whether the spool pin should be horizontal or vertical. Check your manual for the correct orientation.
Wait, are you dealing with an actual bird nest?
Because this site covers real bird nests alongside sewing machine troubleshooting, it's worth a quick note: if you searched 'bird nesting' and ended up here but you're dealing with an actual nest built by a bird (in your garage, on equipment, near an outdoor workspace), that's a different situation entirely, and the guidance is very different.
In the United States, roughly 1,100 native bird species are protected under the Migratory Bird Treaty Act of 1918. That law covers not just the birds themselves but their eggs, young, and active nests. If eggs or chicks are present in a nest you've found, federal law prohibits disturbing or moving it. NestWatch advises stopping any activity that might disturb the nest and waiting until nesting is complete before resuming work in that area. The RSPCA in the UK offers the same core advice: avoid the area and do not move an occupied nest.
The practical takeaway if you find a real nest: photograph it, note the location and date, and leave it alone if it contains eggs or young. Check back once fledglings have left, and then you can address the area. If you need to prevent future nesting in the same spot, do that work only outside of nesting season. This isn't just the ethical call, it's the legal one.
If the bird nest you found is empty and you're trying to identify the species or decide what to do with it, other guides on this site cover nest identification, legal relocation rules, and predator protection in much more detail. The rest of this article is focused entirely on the thread-tangle variety of bird nesting.
Your quick-fix checklist to stop bird nesting right now
Run through this checklist in order. The vast majority of bird nesting problems on both embroidery machines and sewing machines resolve within the first three items.
- Presser foot raised before rethreading: yes or no?
- Thread fully seated in tension discs and take-up lever: confirmed?
- Bobbin unwinding in the correct direction and threaded through both notches in the case?
- Bobbin thread tail length appropriate (about 3/8 inch below presser foot on embroidery machines)?
- Both threads pulled under and behind presser foot before starting?
- Hook race area clean and free of lint and thread debris?
- Needle fully seated, flat side back, not bent or dull?
- Thread weight appropriate: 40–50 weight top, 60–90 weight bobbin for embroidery?
- Needle size matched to fabric weight (75/11 for standard embroidery)?
- Stabilizer adequate for fabric type and design density?
- Spool pin orientation correct for your machine?
- If all above checked and problem persists: schedule service for timing/hook inspection.
Bird nesting is almost always a setup or maintenance problem, not a sign that something is fundamentally broken. For sewing setups, apply the same idea of correct setup and maintenance to prevent bird nesting from recurring. For sewing setups, apply the same idea of correct setup and maintenance to prevent bird nesting from recurring, and if it still returns check the common causes behind why does my sewing machine keep bird nesting. Work through the list above systematically and you'll almost certainly find the cause before you reach the bottom. Related issues like nesting that keeps coming back after you've already fixed it once, or nesting that only happens with specific thread colors or design areas, point toward specific sub-causes covered in the companion guides on fixing bird nesting, preventing it from recurring, and diagnosing why the top thread specifically ends up underneath the fabric.
FAQ
Why does bird nesting happen right at the start of my embroidery or seam?
If the tangle happens only at the beginning of a design or seam, first confirm the presser foot is raised while threading, then pull both the top and bobbin threads back under the foot before the first stitch. Also check that the bobbin tail is the right length (not sticking too far past the underside of the presser foot), because long tails can get grabbed during the first lock of stitches.
Can spool pin orientation or spool unwinding direction cause bird nesting even when threading looks correct?
Do a quick thread-direction test before touching any tension dials. If you can see that the spool unwinds inconsistently (for example, coming off the top when your machine expects it to come off the side), tension becomes uneven even with correct threading through the guides. Set the spool pin orientation and spool position exactly as your machine manual specifies, then retest.
What if I’m getting bird nesting only with certain threads or thread weights?
Change only one variable at a time. If nests disappear when you switch to the recommended top and bobbin thread weights for embroidery (commonly 40 to 50 weight on top, 60 weight in the bobbin on many setups), your original issue may be a thread weight mismatch. Heavy or too-light thread can keep the top and bobbin from locking properly, and you will chase it endlessly if you keep the wrong thread.
How can a wrong or damaged needle lead to bird nesting?
Yes, needle issues can look like tension problems. Replace the needle with the correct size (for many standard embroidery tasks, around 75/11 as a baseline), ensure it is fully seated with the correct orientation, and confirm it is not bent. A needle that is even slightly off can cause the hook to catch the loop late or imperfectly, which leads to loops piling underneath.
How do I tell if bird nesting is caused by hooping or stabilizer, not thread tension?
If the problem changes with fabric motion, hooping and stabilizer are likely the cause. Bird nesting that appears mainly on stretchy fabrics or only in dense regions often comes from fabric shifting in the hoop, changing the needle to hook timing geometry moment to moment. Re-hoop tighter, use the correct stabilizer type for the fabric, and verify the fabric is flat with no wrinkles.
Can lint and thread debris in the hook area cause bird nesting, and how should I clean it?
A cleanup can fix it if thread debris is changing hook clearance or increasing friction. Remove the bobbin and bobbin case, brush out lint from the hook race and surrounding areas, and remove any thread remnants wrapped around the hook. If you do this after every few long sessions (or at least monthly for home machines), you can often prevent recurring nests that look like “mystery tension” issues.
Why does my bird nesting come back after a new bobbin even though I didn’t change anything else?
Yes. After a bobbin change, re-check bobbin-case tension because it can drift from installation differences or partial seating. Don’t treat it as permanently set. Also confirm the anti-spin spring (if your bobbin system has one) is present and correctly positioned, since a bent or missing spring can reduce effective bobbin tension.
How can I quickly tell whether bobbin tension is the problem before adjusting top tension?
Use the bobbin-case hanging test as a baseline: hold the end of the bobbin thread and let the case hang. It should hold position or drop only slightly with a firm jerk. If it drops freely, bobbin tension is too loose, which can create excessive underside looping; if it won’t drop at all, bobbin tension is too tight.
What signs suggest the hook timing is the real cause, not threading or tension?
Timing problems are usually indicated when you have correct threading, correct bobbin placement, and a balanced tension setup, yet nests persist across multiple threads, needles, and fabrics. Timing issues can be triggered by something striking the hook (like a broken needle piece) or by wear from heavy use. Since most machines do not offer user timing adjustment, the practical next step is having a technician inspect the hook and timing.
Could my thread tail length after a trim cause bird nesting at color changes?
Yes. After trimming between colors or before the next run, check that the bobbin thread tail length is at or slightly below the bottom of the presser foot (often about 3/8 inch below, depending on the machine). Too-long tails can be caught during the first stitches of the next color, which can seed a nest at that transition.
What common threading mistakes cause nests even though the machine looks properly threaded?
If the nesting is random and inconsistent, try ruling out “setup state” before chasing tension. Verify you threaded through every guide in order, confirmed the take-up lever has fully captured the thread, and recheck presser foot position during threading. If you accidentally thread with the presser foot down, you can end up with no effective top tension even though the machine appears threaded.
How do I know whether to adjust top tension or bobbin tension based on where the loops appear?
A practical decision aid is to match where the nest forms to the tension relationship. If top thread is looping on the bottom, top tension is often too low or bobbin tension too high. If bobbin thread is showing on top, the relationship is reversed. Use this symptom direction to guide whether you adjust top tension or bobbin tension next.