When an electrode or its wiring looks like it has 'bird-nested,' you are almost always dealing with one of two very different problems: a mechanical or electrical fault where wire or cable has tangled and bunched up around the connection point, or a literal situation where birds have woven nesting material into or around your hardware. The fix, the safety steps, and the legal obligations are completely different depending on which one you have. This guide will help you figure that out fast, then walk you through what to do about it.
What Causes the Electrode to Bird-Nest and How to Fix It

Maya Bennett
22 Mar 2026
What 'bird-nesting' actually means on an electrode
The term 'bird-nesting' is borrowed from two different worlds. In welding, it has a specific technical definition: the wire feed tangles and piles up between the drive roll and the gun liner, forming a chaotic loop that looks just like a small nest. A welding training reference puts it plainly: bird nests occur when the wire is impeded somewhere between the drive roll and the gun liner, and excessive drive roll tension is one of the most common reasons it happens. The same logic applies to any system where wire or cable is under mechanical stress and lacks proper strain relief. Over time it bunches, kinks, and loops around a terminal or electrode in exactly the pattern that gives this problem its name.
The second scenario is literal: a bird has used the electrode housing, wiring conduit, or nearby hardware as an anchor point or material source for an actual nest. This is especially common on outdoor electrodes, fence chargers, monitoring stations, solar equipment, and utility hardware. Nesting material, mud, and debris pack in around the connection point and create a very real electrical and fire hazard. Both problems look similar at first glance, but the causes, solutions, and legal considerations diverge sharply.
Electrical and mechanical causes behind the tangle
If what you are seeing is wire or cable bunched and looped at the electrode rather than actual nesting material, the root cause is almost always mechanical or electrical in nature. Here are the most likely culprits.
Loose or improperly torqued terminal connections
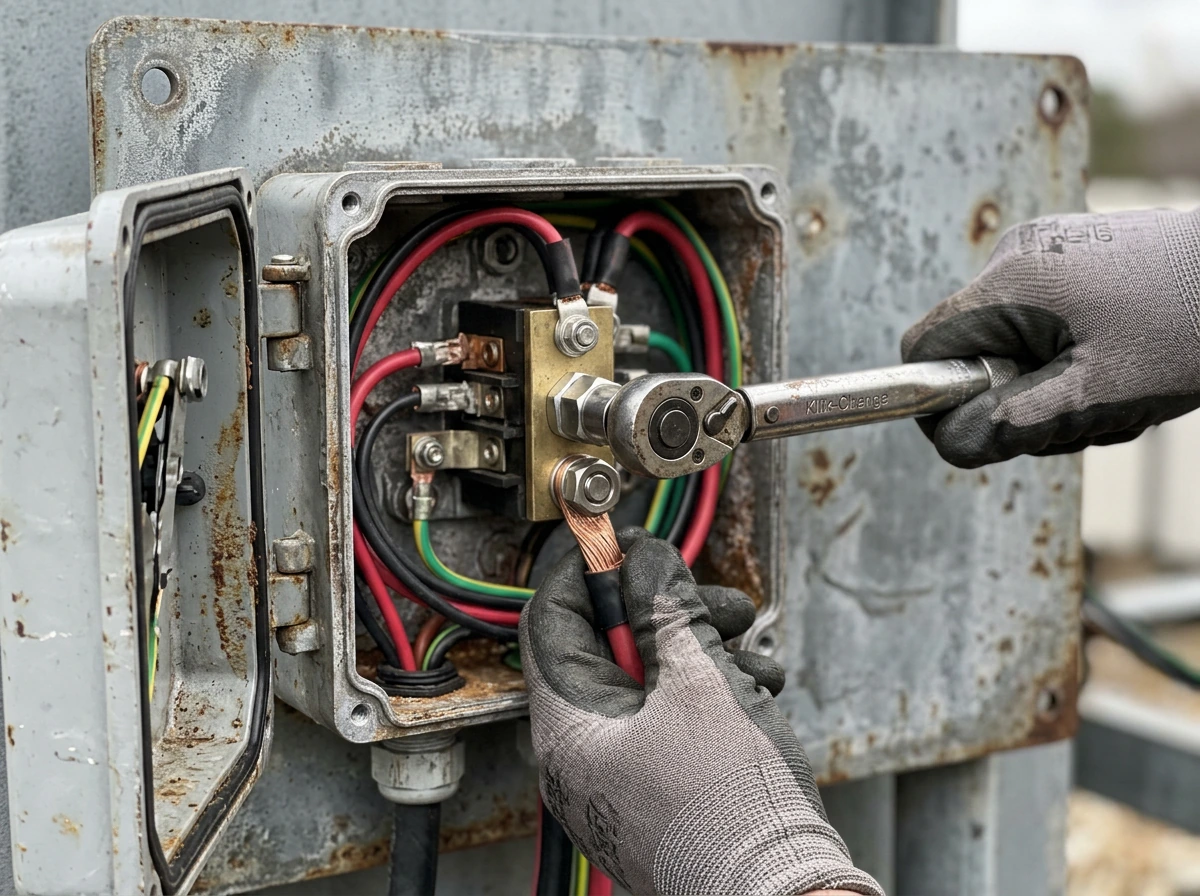
A connection that was never tightened to the manufacturer's specified torque will work itself looser over time. This matters because a loose terminal creates electrical resistance at the contact point. That resistance generates heat, and heat damages both the wire insulation and the terminal itself. Over repeated heat cycles the wire softens, the insulation degrades, and the conductor can begin to move inside the terminal, eventually creeping and coiling. Eaton's fuse-holder guidance specifically calls out improper torque as a driver of overheating and fire risk. EC&M's case analysis adds that a terminal left too loose can arc and spark, which accelerates wire damage dramatically. If your electrode connection was assembled without a calibrated torque tool and a target value, this is your first suspect.
Vibration, fatigue, and environmental stress
Even a correctly torqued connection can loosen over time if the installation is exposed to vibration, thermal cycling, or mechanical stress without proper strain relief. Connections in motors, generators, fence chargers, and outdoor equipment all experience this. Once a connection loosens, resistance rises, temperature rises, and the cycle of degradation accelerates, which is exactly what can cause a welding wire-feed “bird-nesting” situation when the wire feed tangles and piles up between the drive roll and the gun liner. bird nesting welding definition Thermal imaging is one of the most reliable early-detection methods here because the heat signature at a failing connection shows up long before visible damage appears.
Drive roll tension and liner problems (welding context)
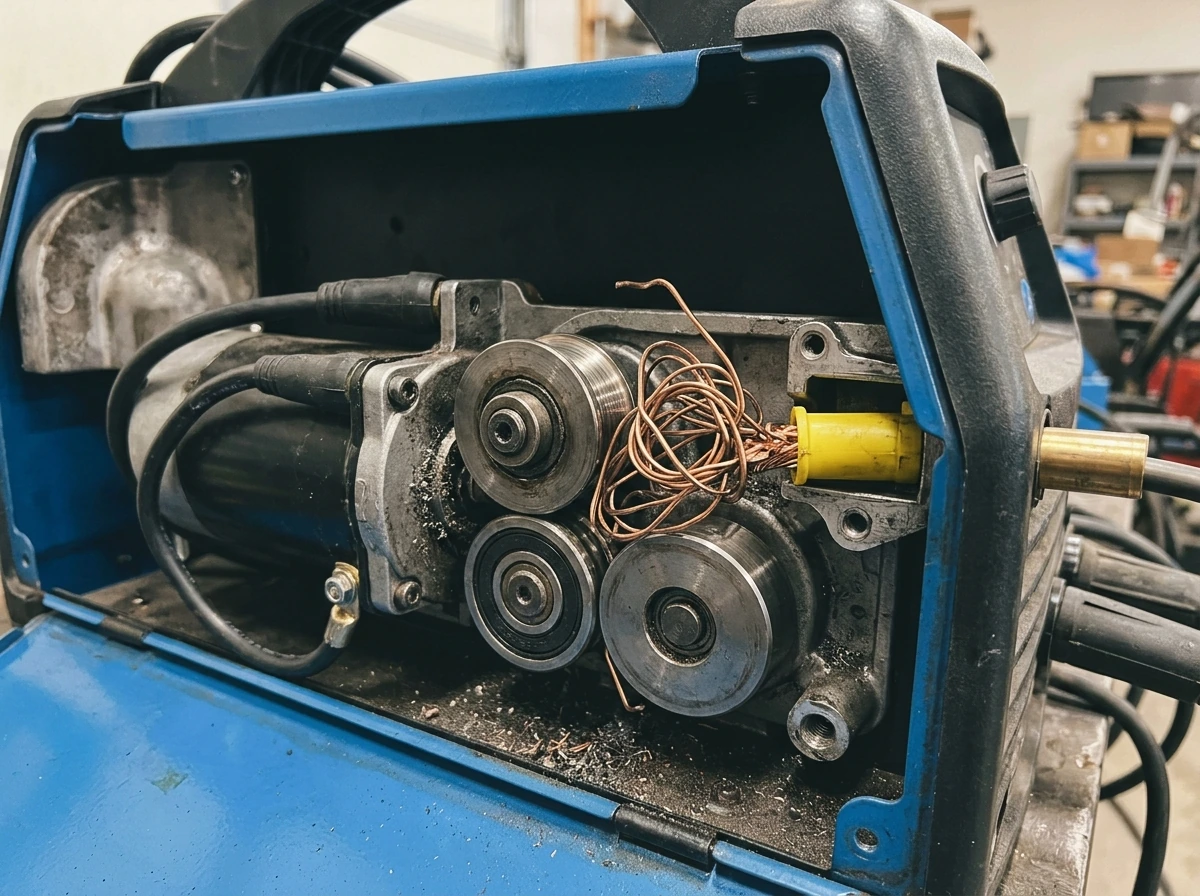
If your electrode is a welding wire-feed system, the mechanics are even more specific. Too much drive roll tension crushes the wire and causes it to deform, which then resists smooth travel through the liner. Too little tension lets the wire slip and stutter. Either way, the wire piles up between the drive roll and the gun liner. Liner drag from dirt accumulation or a kinked liner compounds the problem. The fix described in welding troubleshooting resources is straightforward: flip up the drive roll, pull the birdnested wire back out of the gun, inspect the liner for blockage, adjust tension, and reload. But preventing it from happening again requires addressing whichever of these root causes is actually present.
Corrosion at the connection point
Corrosion increases resistance just as a loose connection does. In humid or coastal environments, oxide buildup on a terminal can cause localized heating that mimics the damage pattern of a torque problem. The wire insulation near the terminal begins to break down, the conductor may strand-separate, and the whole connection can take on a disordered, bundled appearance. Corrosion and loose connections often appear together because moisture that accelerates corrosion also tends to get into connections that are not fully sealed.
When the environment and actual birds are the problem
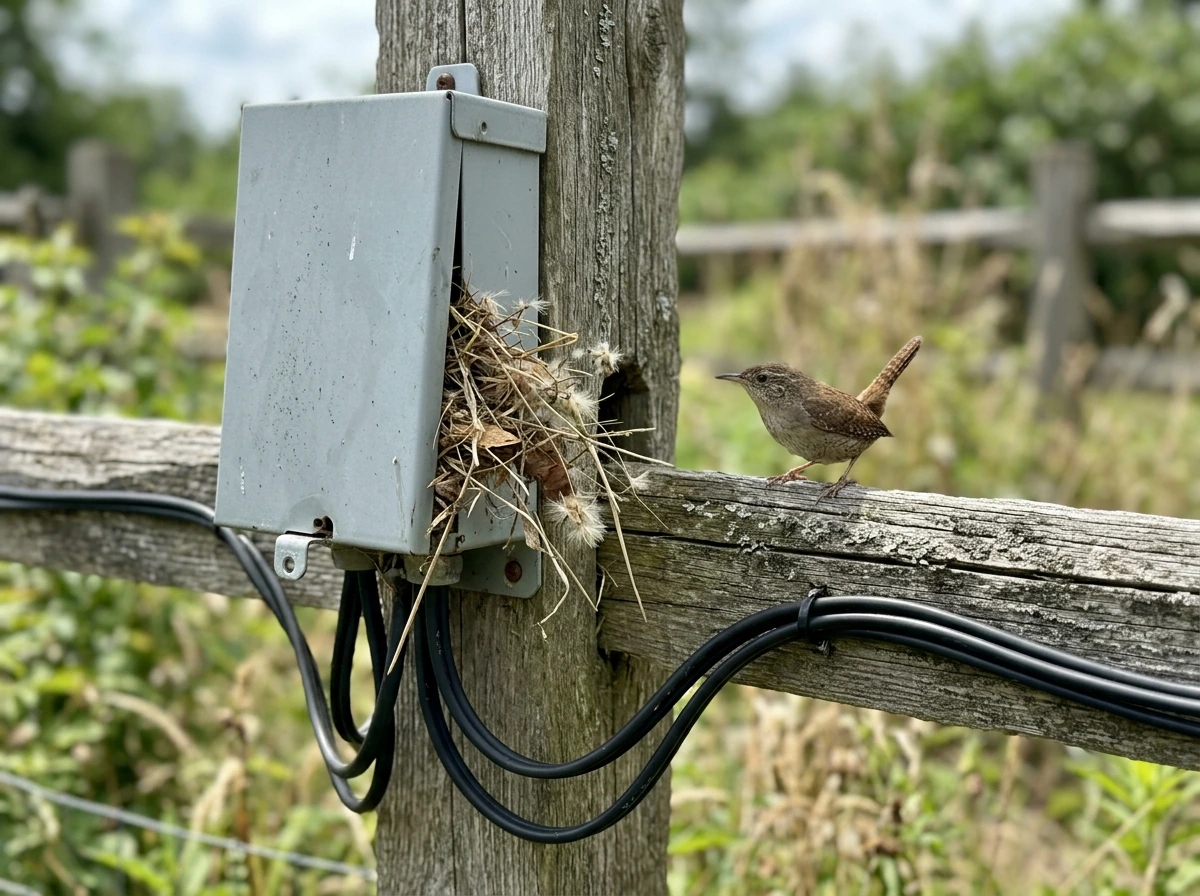
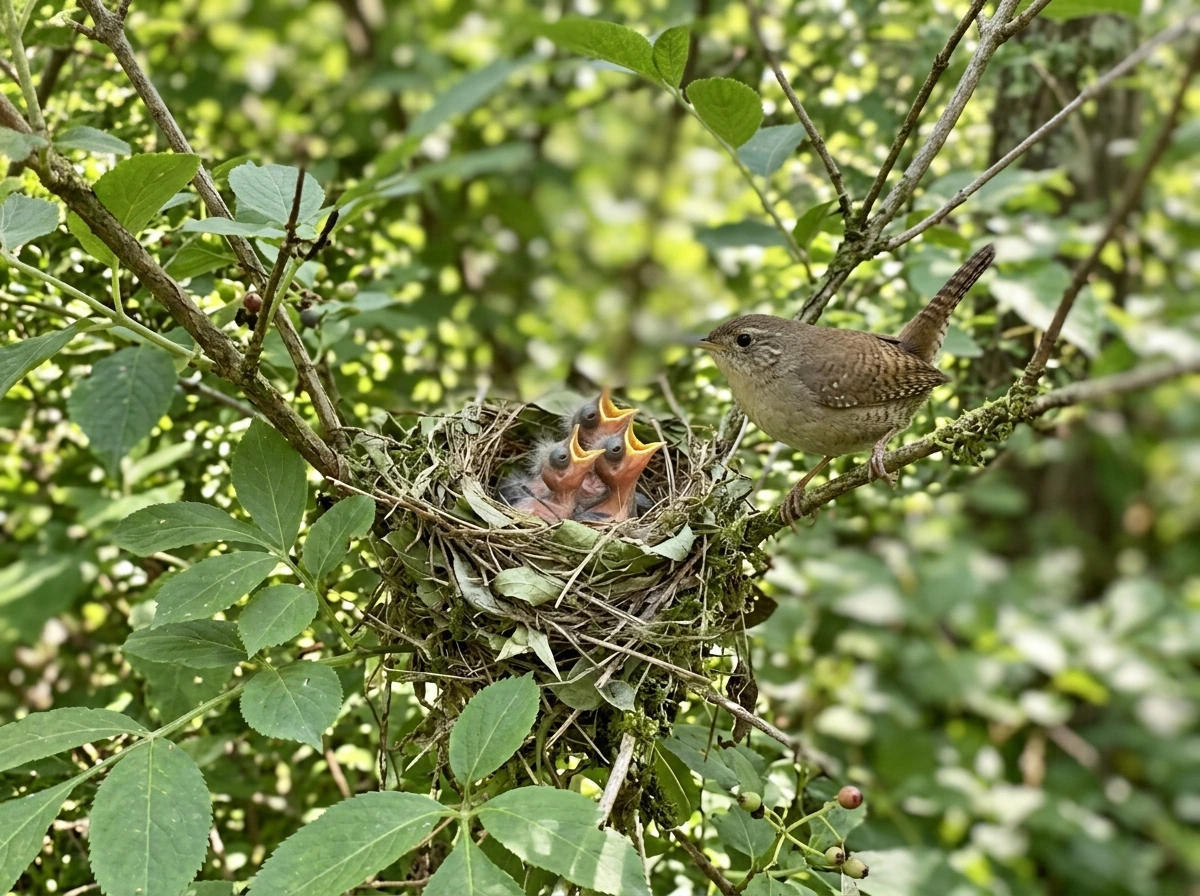
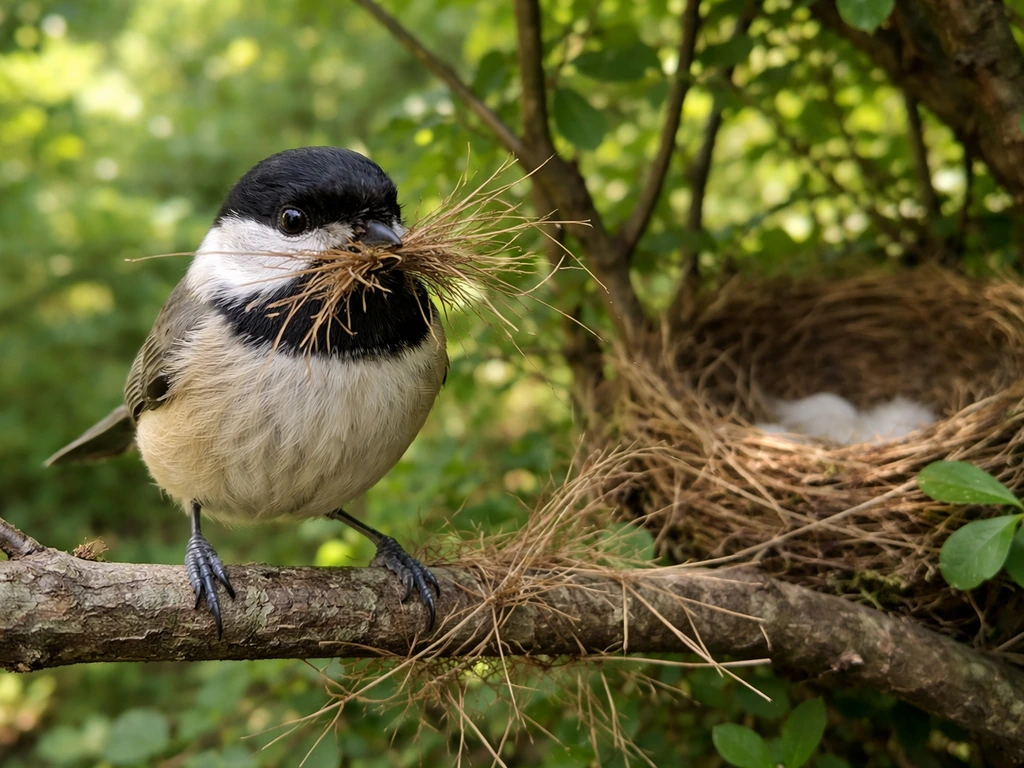
Outdoor electrodes and electrical hardware are genuinely attractive to birds. This is not random. Utility poles, fence-charger boxes, monitoring stations, and any elevated horizontal surface offer shelter, warmth (energized equipment often radiates heat), and a structural anchor that feels stable to a nesting bird. House sparrows, starlings, swallows, and wrens are the species most commonly found nesting in and around electrical equipment, but many species will exploit a protected cavity near a warm surface.
The hazard works in both directions. Nesting material packed around an electrode is dry, fibrous, and often includes feathers, which can act as an insulator at first but becomes a fire risk when the electrode heats or sparks, The hazard works in both directions. Nesting material packed around an electrode is dry, fibrous, and often includes feathers, which can act as an insulator at first but becomes a fire risk when the electrode heats or sparks, so if you’re wondering what is bird nesting in marriage, remember it can also create real electrical and fire hazards. To learn the basics, see what is bird nesting co parenting and how the term is used in family discussions. This is also why you may hear the phrase “bird nesting” in conversations about marriage and relationships: people use it as a metaphor for unresolved issues and tangled communication that needs attention what is bird nesting in marriage. From the bird's perspective, the risk is electrocution. USGS research describes the mechanism: electrocution occurs when a bird's body bridges an electrical potential, either between two energized parts or between an energized part and a grounded surface. When conductors are close together relative to the bird's wingspan, the risk is highest. Nesting activity increases the number of times birds contact the hardware, which raises that risk substantially. APLIC adds that young birds leaving and returning to nests on electrical structures bisect spans more frequently, raising both collision and electrocution exposure.
Nesting season concentrates this problem. Activity ramps up from March onward in most of North America, with peak nest-building typically running from late March through early July depending on species and region. If you are inspecting outdoor electrode hardware in spring or early summer and find any fibrous, woven, or mudded material, you need to treat it as a potential active nest until you confirm otherwise.
How to figure out which problem you actually have
Before you touch anything, stop and assess. Here is a quick diagnostic sequence you can run today.
- Look before you touch. Stand back and observe the electrode and surrounding area for 60 seconds. Are there birds present, flying in and out, or calling defensively? If yes, treat this as a live nest situation and do not approach the hardware yet.
- Photograph everything. Take pictures from multiple angles before disturbing anything. This protects you legally and gives you a reference if you need to call a wildlife professional.
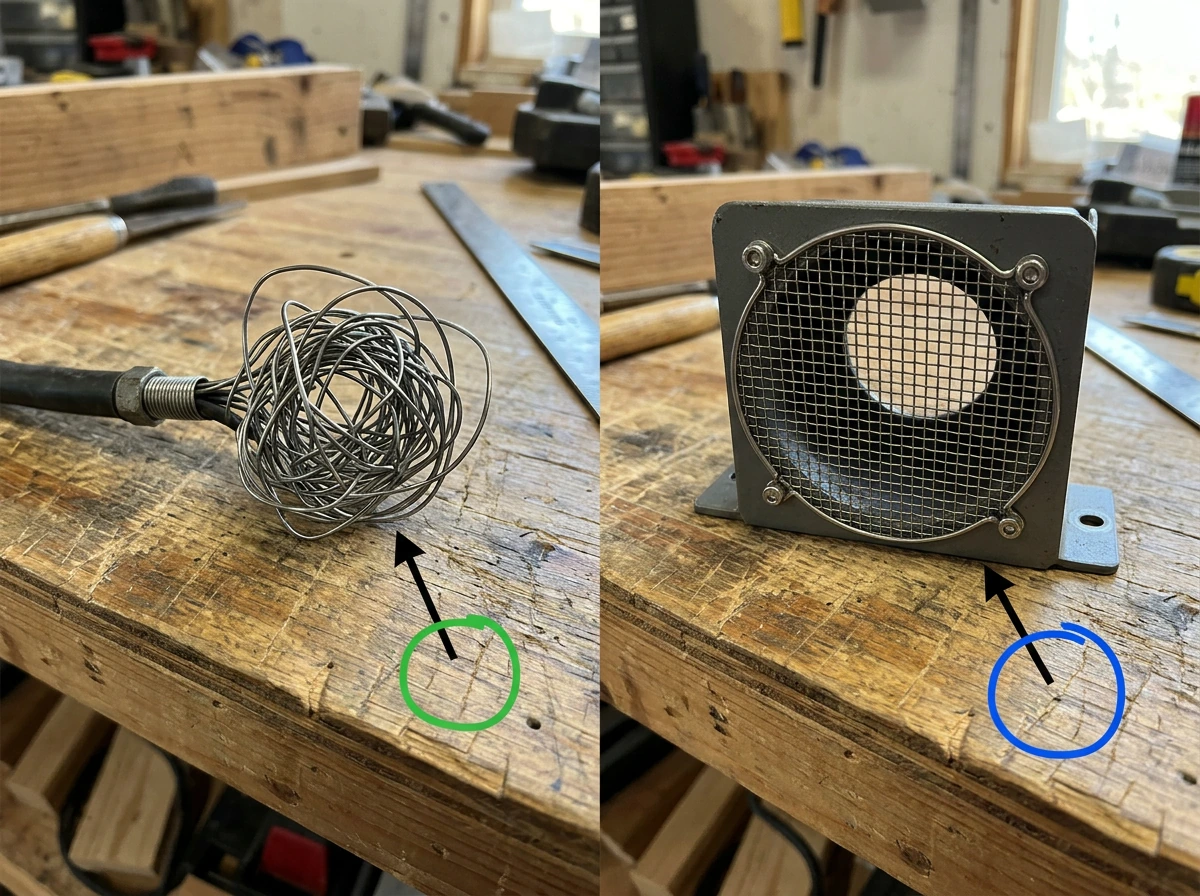
- Identify the material. Wire and cable that has tangled will be uniform in color and material, with kinks and loops that follow the wire's own stiffness. Actual nest material is varied: grass stems, bark strips, feathers, mud, hair, or spider silk woven together. These look completely different up close.
- Check for eggs or chicks. If you can safely see into the nest area without touching it, look for eggs or young birds. Even one egg makes this an active nest under the law.
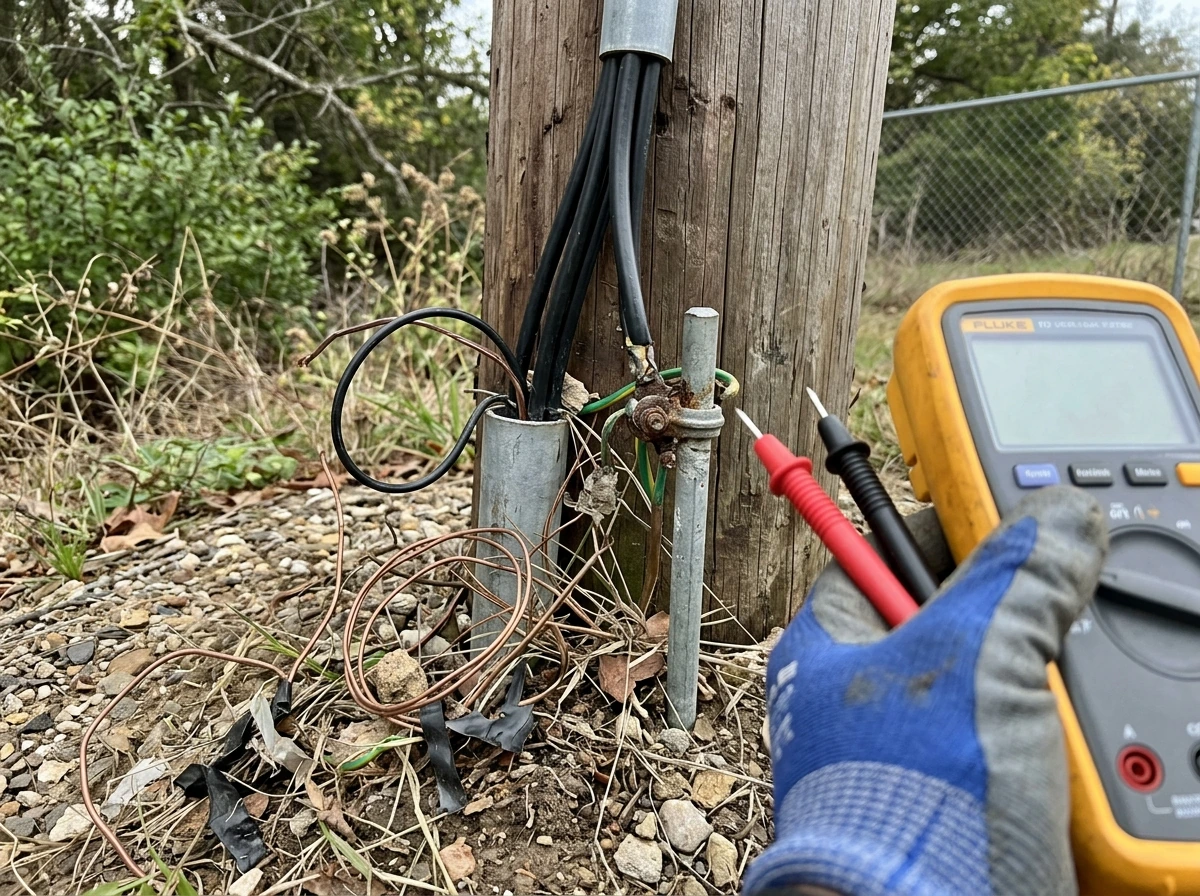
- Inspect the electrode connection. If no nest material is present, look at the terminal. Is the wire insulation discolored, cracked, or melted near the connection? Is the terminal loose when you apply gentle finger pressure with the system de-energized and locked out? These are signs of the mechanical/electrical cause.
- Check drive roll tension if this is a welding system. With the power off, open the drive roll housing and look at the wire. Is it crushed, kinked, or piled up? Does the liner show kinks or drag resistance?
- Feel for heat (carefully, with power off). A connection that has been overheating will often show discoloration on the terminal housing or on nearby wire insulation even after the power is removed.
Fixes that stop the problem from coming back
Electrical and mechanical fixes
Always begin with a proper lockout/tagout procedure. OSHA's standard 1910.147 governs the control of hazardous energy and requires that equipment be fully de-energized and locked out before you begin any inspection or repair work on electrical connections. Do not skip this step, and do not assume the system is safe because a switch is in the off position. Use a calibrated torque tool to tighten terminals to the manufacturer's specified value. If you do not have a torque specification, consult the manufacturer's documentation before guessing. Improper torque in either direction, too loose or too tight, creates problems.
Once the connection is properly torqued, address the mechanical factors. Install proper strain relief so that the cable cannot transmit vibration or movement directly to the terminal. Replace any wire with damaged insulation. Clean corroded terminals with an appropriate contact cleaner and apply an anti-oxidant compound rated for the terminal material. If the connection is in a vibration-heavy environment, consider a connection style that resists vibration loosening, such as a locking terminal.
For welding wire-feed bird-nesting, the correction sequence is: de-energize the welder, flip up the drive roll, pull the tangled wire back through and out of the system, inspect the liner for kinks and clean or replace it if needed, reload wire, and reset drive roll tension to the manufacturer's recommended range for your wire diameter and type. Test-feed a short section before resuming work.
Preventing bird-nesting on outdoor electrodes
Physical exclusion is the most effective and legally safe approach. The goal is to make the electrode housing or nearby surface unsuitable for nest-building without harming birds or interfering with the equipment's function.
- Install bird exclusion hardware (wire mesh, spikes, or sloped panels) on any flat surface or ledge adjacent to the electrode before nesting season begins, ideally by late February.
- Seal any cavity or gap in equipment enclosures larger than about 3/4 inch (roughly 19mm) that a small bird like a wren or sparrow could enter.
- Run cables in conduit rather than leaving them exposed, and use conduit fittings that close off gap around entry points.
- Use cable management trays and tie-downs to keep wiring neat and remove the structural complexity that birds interpret as nesting substrate.
- Inspect outdoor electrode hardware monthly from March through August and immediately after any storm that could dislodge or deliver debris.
A quick comparison: mechanical fix vs. exclusion approach
| Scenario | Primary cause | Fix | Prevention |
|---|---|---|---|
| Wire tangled at electrode terminal | Loose connection, vibration, or poor strain relief | Lockout/tagout, re-torque, replace damaged wire, add strain relief | Calibrated torque, vibration-resistant terminals, conduit |
| Wire piled up in welding system | Drive roll tension too high/low, dirty or kinked liner | Remove tangled wire, clean/replace liner, reset tension | Correct tension setting, regular liner inspection |
| Actual nest material at electrode | Birds using hardware as nest site anchor | Exclusion hardware installed before season; do not remove active nests | Mesh, sloped surfaces, sealed enclosures installed by late February |
| Debris accumulation from nearby nests | Nesting activity on adjacent structure dropping material | Clean debris with power off, inspect for damage; address nearby nest site | Exclusion on adjacent structure, regular inspection schedule |
The legal picture and what to do if the nest is active
This is where many people make costly mistakes. The Migratory Bird Treaty Act (MBTA) protects the vast majority of wild bird species found in North America, and that protection extends to their nests when eggs or chicks are present. The U.S. Fish and Wildlife Service is clear: permits to remove a nest are typically issued only when the nest poses a direct human health or safety concern or the birds themselves are in immediate danger. If you find an active nest on or adjacent to your electrode hardware, you need to stop work in that area.
There is one nuance worth understanding. The MBTA does not explicitly prohibit the destruction of an empty nest by itself, provided you do not possess it during destruction. An empty nest with no eggs, no chicks, and no birds actively using it can generally be removed. But confirming a nest is truly inactive requires careful observation, not just a quick glance. Birds leave nests temporarily and return. If there is any doubt, wait and watch.
From a practical standpoint, the restricted season for disturbance runs roughly from March 1 through September 15 in most jurisdictions, though active nests are protected year-round whenever eggs or chicks are present. WSDOT's bird protection protocols define an active nest as one containing eggs or chicks in or near the nest, and require notification of a wildlife specialist when an active nest is discovered in a work area. That same standard applies to homeowners dealing with outdoor electrical equipment.
Disturbance matters even when you do not physically touch a nest. FWC research shows that human activity near a nest can frighten adult birds off, exposing eggs and nestlings to temperature extremes and predators in minutes. Keep your distance, keep noise down, and limit activity near the site until the nest is naturally vacated.
Step-by-step: what to do right now if you find an active nest
- Stop work immediately in the area around the electrode. Do not attempt to remove material or access the connection.
- Photograph the nest, noting the date, time, location, and any evidence of eggs, chicks, or adult bird presence.
- If the electrode poses an immediate, active electrical safety hazard (arcing, sparking, or fire risk), call a licensed electrician and a wildlife professional at the same time. Do not attempt DIY work near exposed energized parts. OSHA's 1926.960 sets minimum approach-distance requirements for work near energized conductors for exactly this reason.
- Contact your regional U.S. Fish and Wildlife Service office or state wildlife agency to explain the situation. They can advise on whether an emergency permit is appropriate given the safety concern.
- If the hazard is not immediate, wait. Most songbird nests fledge within 10 to 14 days of hatching. A nest with eggs will typically be vacated within three to four weeks of discovery if you leave it undisturbed.
- Once the nest is confirmed empty and the season is appropriate, remove it, clean the electrode area with power fully locked out, inspect for damage, make repairs, and install exclusion hardware before the next season.
When to call a professional
Call a licensed electrician if you see scorched insulation, melted terminals, or evidence of arcing at the electrode. Call a licensed wildlife rehabilitator if you find injured or fallen nestlings. Call your state wildlife agency or USFWS if you believe a removal permit is needed for a safety-critical situation. These are not situations where guessing serves you well. The combination of electrical hazard and protected species creates genuine legal and safety exposure for anyone who proceeds without guidance.
Understanding what 'bird-nesting' means for your specific situation, whether it is a wiring fault or a literal nest, is the first and most important step. Once you know what you are dealing with, the path forward is clear: fix the electrical problem correctly, exclude birds from the hardware before the season begins, and if an active nest is already in place, give it the legal protection it deserves while you manage the safety side with qualified help.
FAQ
How can I tell whether I’m dealing with tangled wire versus an actual bird nest if they look the same?
Check what the material is made of. Tangled-wire problems usually show continuous insulation and conductor strands that trace back to a connection, while a true nest looks like discrete fibrous material (often mud, twigs, feathers) packed into a cavity or around a housing seam. Also look for insect-like debris buildup that forms around nests, not around a loose electrical contact point.
What should I do if the electrode connection is arcing, even before I find the bird nest problem?
Stop and treat it as an active electrical fault. De-energize using lockout/tagout, then inspect only after the circuit is proven dead. If you see scorched insulation, melted terminal material, or repeated sparking evidence, do not attempt to “tighten and hope,” call a licensed electrician first because damaged contacts may need replacement, not just re-torquing.
Can I fix a loose terminal without replacing any wire or terminal if it just looks discolored?
Discoloration is often a sign of heat damage, which can reduce conductor integrity and terminal clamp effectiveness. If insulation is brittle, cracked, or the conductor has any signs of strand separation, replace the affected cable section and terminal. Re-torque alone is most appropriate only when there is no heat-related damage and you can restore the proper contact geometry.
How do I choose the right torque value if I don’t have the manufacturer specification?
Do not guess. Use the specific equipment model and terminal size to look up the torque spec in the manufacturer documentation for that exact component. If you cannot obtain it, switch to having an electrician perform the torque procedure with calibrated tools, because both under-torque and over-torque can create resistance, cracking, or loosening under vibration.
What drive-roll tension adjustment mistakes cause or worsen welding wire-feed bird-nesting?
Common mistakes include setting tension too high (which deforms the wire and increases drag in the liner) or too low (which causes slipping and inconsistent feed). Another frequent issue is not matching tension to wire diameter and type, so verify both parameters before test-feeding a short section.
If the welding liner looks clean, could wire bird-nesting still be caused by problems elsewhere?
Yes. Liner drag can come from kinks near the gun connection, a worn or improperly seated liner, or a misaligned drive roll and feed path, even if the liner appears generally clean. Also verify the gun liner is the correct length and that the gun connection is properly fitted and not compressing or buckling the liner.
Is corrosion always visible where the wire meets the terminal, or can it hide?
Corrosion can be internal, especially under sealing compounds or inside cable entry points. If the connection area is sealed and you see any signs of heat, bubbling, or greenish/white residue nearby, plan on cleaning and inspecting the entire termination region (and replacing components if the terminal or conductor shows heat-related weakening).
If I find an active nest near outdoor electrical hardware, can I just keep working carefully without removing anything?
Often you should avoid work in the immediate area until the nest is naturally vacated, because disturbance can push adults away and expose eggs or nestlings to temperature stress and predators. If work is safety-critical, coordinate with a qualified wildlife professional or your state wildlife agency so the approach minimizes disturbance and stays compliant.
What’s the safest way to exclude birds without creating new electrical or fire risks?
Use exclusion that does not block cooling vents, seals, or cable routing and does not force wires to bend sharply. Prefer bird-proofing covers designed for your equipment, add barriers that prevent access to cavities, and ensure all cable strain relief remains intact so you do not create new loose-connection conditions.
Should I cover the electrode hardware while birds are nesting, or does covering increase risk?
Covering can help only if the cover is intended for weather protection and maintains safe airflow and access to service points. A poor cover can trap moisture, increase corrosion, or create a new cavity that birds exploit. If you cover the hardware, verify the design keeps terminals accessible for inspection and does not compromise sealing or grounding.
When do I need a wildlife professional versus a regular electrician?
Call an electrician if you see evidence of electrical heat or damage such as melted insulation, arcing marks, or abnormal heat signatures. Call a wildlife rehabilitator if there are injured or fallen nestlings. If the nest is active and removal might be involved for safety, contact your state wildlife agency or USFWS for guidance so the electrical hazard gets addressed without violating protected-species rules.