If a bird hasn't laid eggs yet, you can remove the nest today and install a physical barrier to stop them coming back. If eggs or chicks are already present, you're legally required to leave it alone until the nest goes inactive, then remove it and proof the fixture the same day. Either way, the fastest fix is a combination of a physical deterrent on the fixture itself plus a lighting change that makes the spot less attractive in the first place.
How to Keep Bird Nests Off Light Fixtures Safely
Maya Bennett
28 Apr 2026
Why birds choose light fixtures
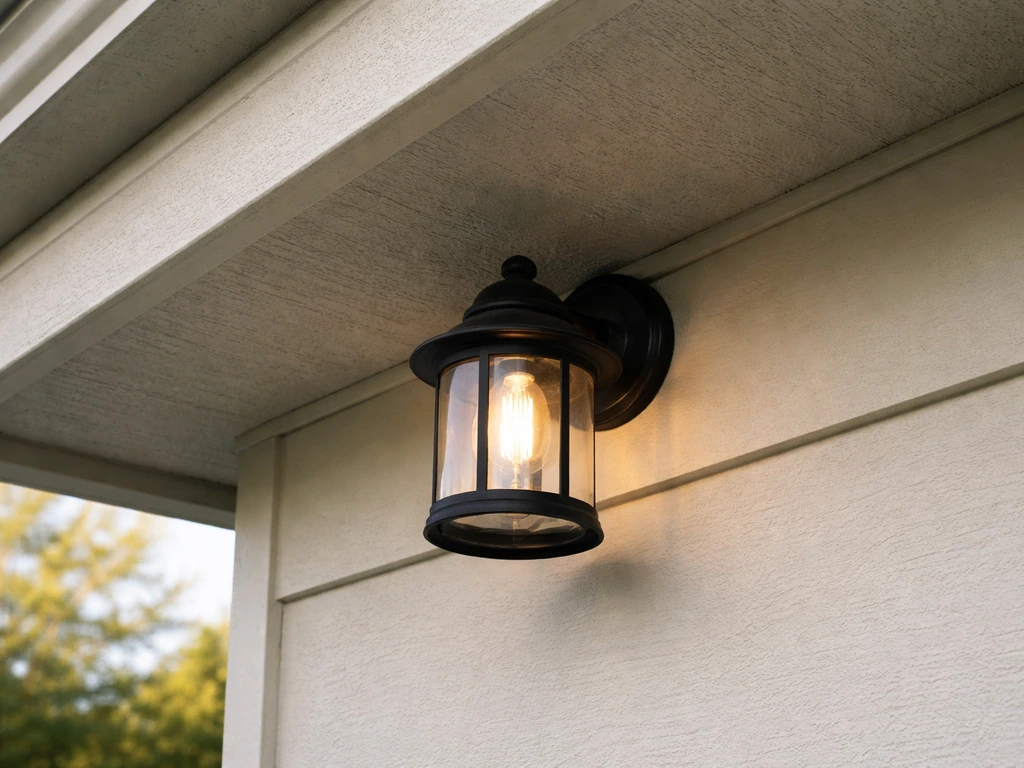
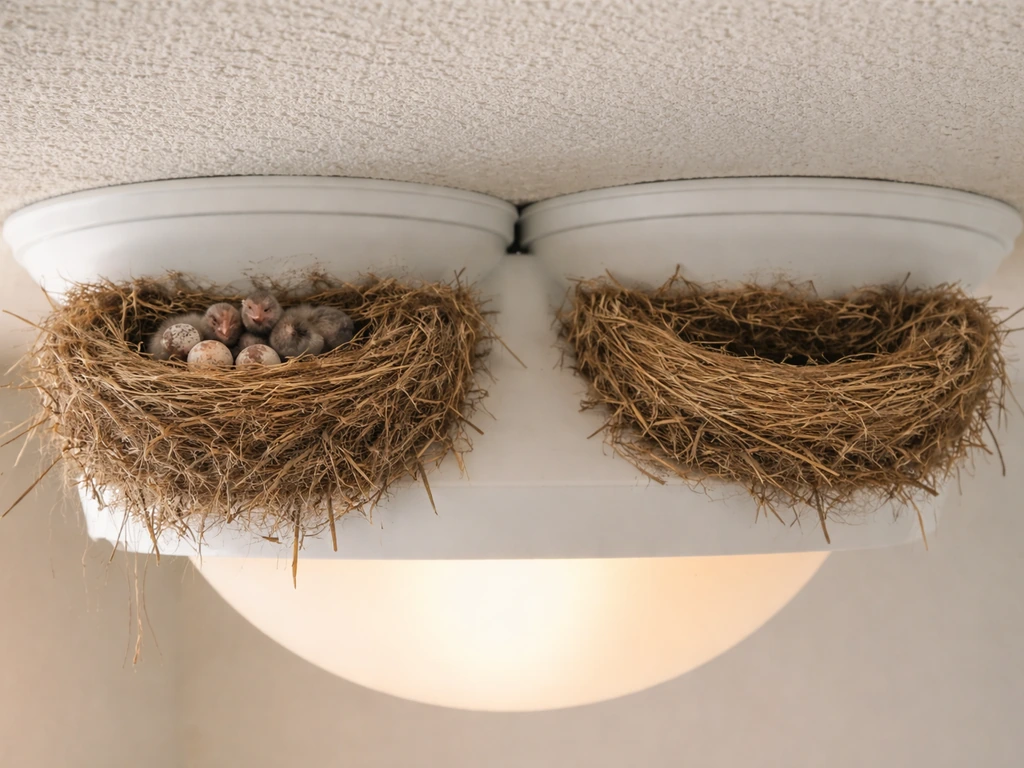
Exterior light fixtures tick almost every box a nesting bird is looking for. They sit up high, giving the bird a clear sightline for predators. They're sheltered under an eave or overhang, protecting the nest from rain. The housing itself provides a ready-made cavity or ledge that feels structurally solid. And then there's the light itself: research published in Scientific Reports confirms that illumination levels inside a nest cavity influence both nest-site choice and embryo development, with cavity-nesting species showing especially strong preferences for specific light conditions. A warm porch light glowing at dusk lines up surprisingly well with what many species are wired to seek out.
Add to that the fact that fixtures are often close to human activity, which can actually deter some predators, and you start to understand why a porch sconce or a carport floodlight feels like prime real estate to a house finch or a robin. The problem isn't that the bird is making a bad decision; it's that the fixture was never designed to be a nest site, and the consequences for you (droppings, fire risk from dry nesting material, blocked wiring, recurring mess) are real.
How to identify the nest type and whether it's active
Before you do anything, spend two minutes figuring out exactly what you're dealing with. Getting this wrong has legal consequences.
Reading the nest itself
You don't need to know the exact species to make a smart decision. Look at the materials. A cup-shaped nest made of grasses, twigs, and mud pressed against a wall or ledge is almost always a robin or similar thrush. Bird nests stay together because of how the materials interlock and how the birds weave and press the structure into a stable shape A cup-shaped nest. A looser, messier structure packed with grasses, feathers, and occasionally plastic strings is typical of house sparrows or house finches. A small, tight cup woven with fine plant fibers and spider silk suggests a smaller songbird. Any of these can show up on or inside a light fixture. Take a photo from a safe distance before you touch anything.
Active vs. inactive: the check that matters most
An active nest contains eggs, live chicks, or a bird that is currently incubating. An inactive nest has none of these: no eggs, no chicks, no adult bird returning regularly. Here's how to tell the difference without disturbing anything:
- Watch from a distance for 10 to 15 minutes. If an adult bird returns repeatedly to the nest, it's active.
- Look for eggs (smooth, often speckled, typically 1 to 6 depending on species) or chicks (featherless or downy, visibly moving).
- Check for fresh droppings directly below the nest cup, which is a strong signal of active use.
- A nest that looks ragged, flattened, or weathered with no recent adult visits over several days is likely inactive.
- Smithsonian nest monitoring guidelines note that songbird incubation typically runs 11 to 14 days, and chicks hatch within 24 to 48 hours of each other, so fledging usually happens 2 to 3 weeks after the first egg is laid. If you've been watching since the start, you can estimate a timeline.
If you're not sure, assume active and keep watching. Taking a quick photo every day or two with a date stamp gives you documentation that's genuinely useful if you ever need to contact a wildlife officer.
Humane exclusion and deterrence options you can use right now
If the nest is not yet active (no eggs, no chicks)
This is your window. Remove the nest material completely, clean the fixture surface, and immediately install a deterrent the same day. Leaving the fixture bare without a deterrent almost guarantees the bird returns to rebuild, sometimes within 24 hours. The most effective immediate options are a physical spike strip or gel pad on any flat or curved surface the bird was landing on, a plastic owl or hawk decoy positioned within a few feet of the fixture (move it every few days so birds don't habituate to it), and shiny reflective tape or ribbon hung near the fixture to create movement and visual disruption.
One thing to avoid: chemical or scent-based deterrents sold as bird repellents. Most are minimally effective outdoors, can contaminate surfaces that other wildlife contacts, and some are outright illegal in certain jurisdictions when used near protected species. Stick to physical deterrents.
If the nest is active (eggs or chicks present)
Stop. Under the U.S. Migratory Bird Treaty Act (MBTA), intentionally disturbing, destroying, or removing an active nest (one containing eggs, nestlings, or viable eggs) is illegal and can result in prosecution. Canada's Migratory Birds Regulations 2022 carry the same prohibition. You do not have a legal path to remove or relocate an active nest without a federal permit, and those permits are issued for specific situations, not routine homeowner convenience. The right move is to wait it out. Most songbirds fledge within 2 to 3 weeks of hatching. Mark the date you first noticed eggs, and plan to act immediately once the nest goes quiet and adults stop returning.
While you're waiting, you can still reduce attractiveness around the fixture, adjust your lighting (covered below), and plan your proofing strategy so you're ready to move the moment the nest is inactive. Keeping predators away from an active nest during this waiting period is the responsible thing to do, and there are good options for that.
Physical proofing: sealing gaps and installing barriers
This is the long-term fix. Deterrents buy you time; physical proofing is what actually solves the problem across seasons.
Block the landing and building surfaces
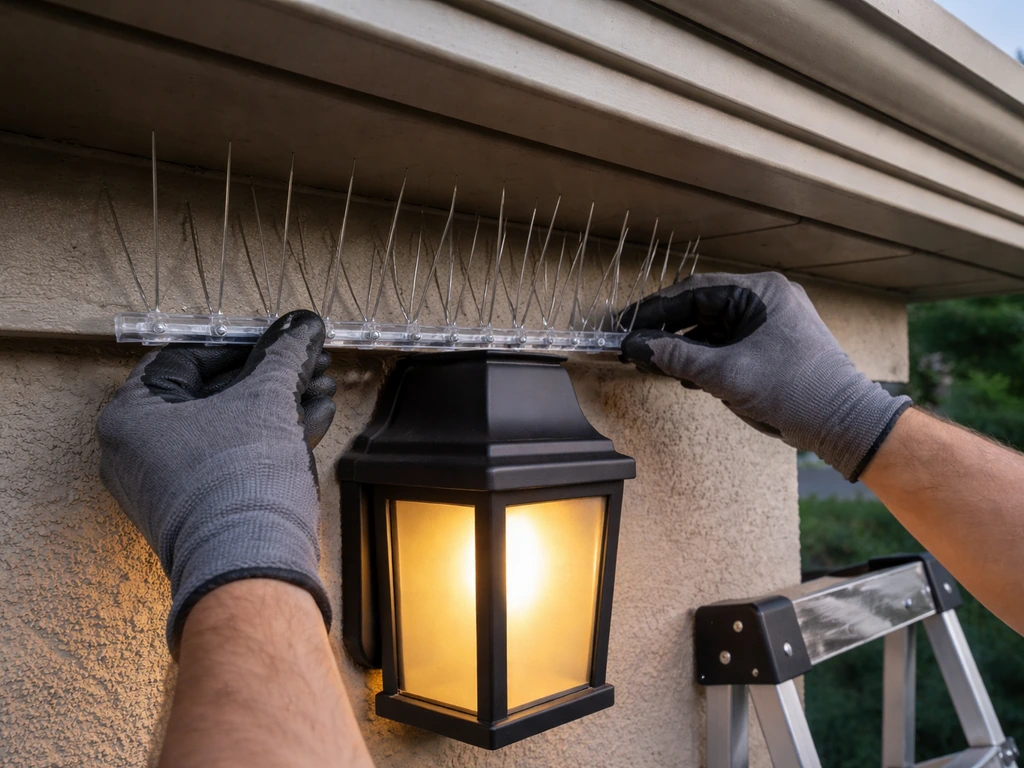
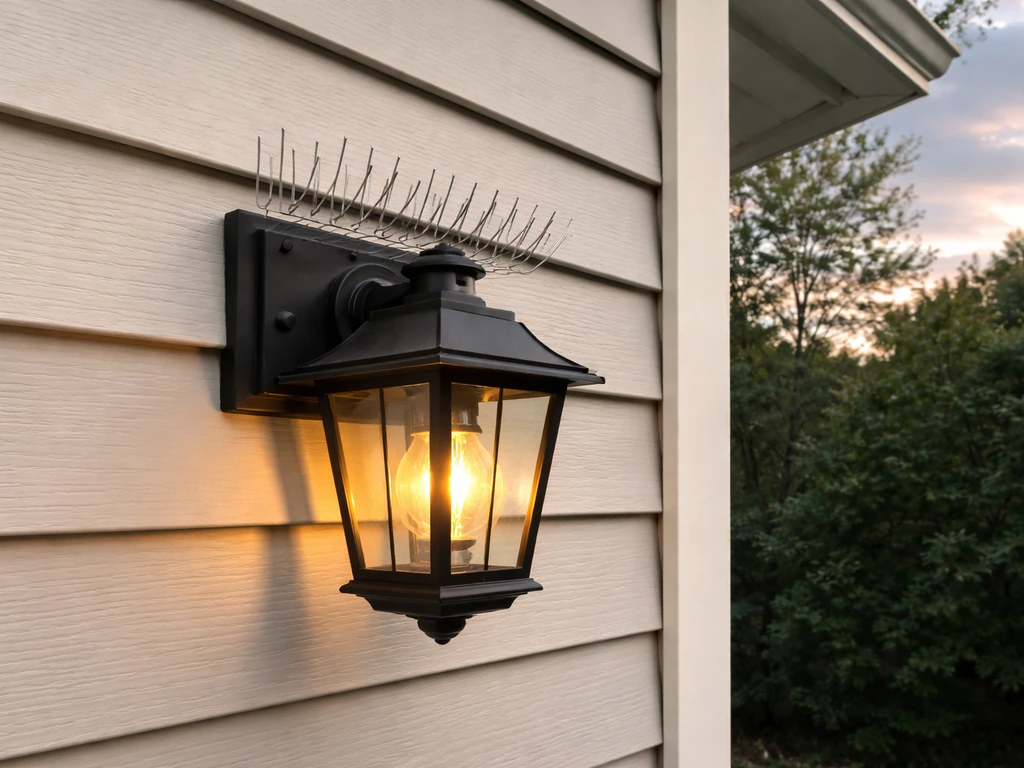
Bird spike strips are the most practical solution for flat tops of sconces, post lights, and recessed fixture housings. They're available in plastic or stainless steel, come in 1-foot sections, and can be trimmed to fit curved or irregular surfaces with tin snips. Apply them to any horizontal surface directly on or adjacent to the fixture. For larger open-faced fixtures (like carport or barn lights with a wide reflector), a cone or baffle-style guard installed above or around the fixture housing eliminates the flat landing zone entirely.
Exclusion netting for larger areas
If you have multiple fixtures under an eave, or if birds are nesting in the gap between the fixture back plate and the wall, exclusion netting is the most thorough solution. Wildlife control training guidance recommends using approximately 3/4-inch mesh netting for smaller songbirds and house sparrows, with heavier mesh for larger species. Use UV-stable netting with stainless steel hardware so it holds up through sun exposure and doesn't degrade into a wildlife entanglement hazard. Properly installed netting creates a physical barrier across the entire eave cavity, excluding birds from every fixture in the zone at once.
Seal access points on and around the fixture

Check the back plate of every exterior fixture. A gap of even half an inch between the plate and the wall is enough for a house sparrow to squeeze behind it and build inside. Use outdoor-rated silicone caulk or foam backer rod to close any gap that doesn't need to remain open for ventilation. While you're at it, inspect the conduit entry point and any decorative gaps in fixture housings. These small sealing jobs take ten minutes each and eliminate nesting spots entirely.
Lighting changes to make fixtures less attractive
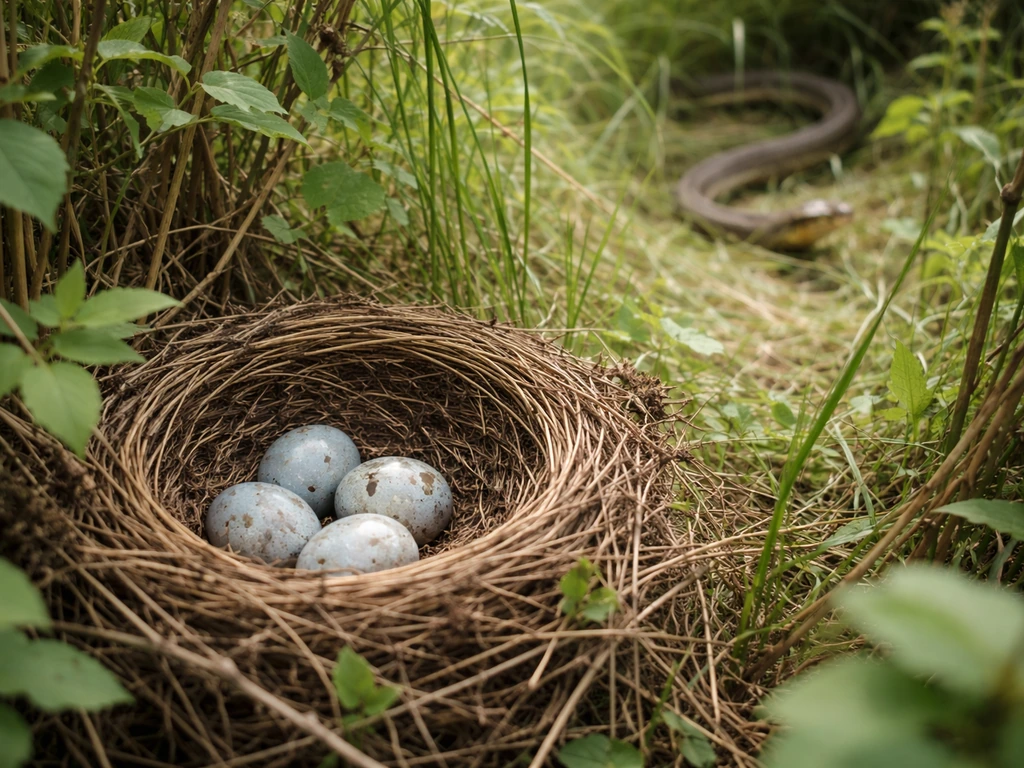
Since light conditions are part of what draws cavity-nesting birds to fixtures in the first place, changing how your lights operate can meaningfully reduce the problem. Because bird nests also create sheltered cover and attract rodents, they can sometimes draw in snakes looking for prey and warmer hiding spots bird nests can attract snakes. If you are dealing with snakes, review how to keep snakes away from bird nests alongside your lighting adjustments and deterrent plan. These changes also tend to reduce insect attraction, which is a secondary draw for birds scouting for feeding and nesting sites near active insect populations.
| Change | What it does | Best for |
|---|---|---|
| Switch to warm-color LEDs (2700K or lower) | Reduces UV-spectrum output that attracts insects and may reduce the light-level profile that attracts cavity nesters | Any exterior fixture currently using cool-white or daylight bulbs |
| Install motion-activated sensors | Limits the hours the fixture is lit, reducing nesting-season exposure; disrupts the consistent light cue birds respond to | Porch lights, carport lights, garage fixtures |
| Add a shield or hood to direct light downward | Eliminates upward-facing illumination that makes the fixture top or wall above it glow warmly; reduces the visual beacon effect | Gooseneck or exposed-bulb fixtures, barn lights |
| Reduce wattage or use dimmer settings | Lowers the intensity of the light environment near the fixture without eliminating security lighting entirely | Any fixture where full brightness isn't required all night |
| Set timer controls for targeted hours | Turns lights off during peak dawn-activity periods when birds are most likely scouting nest sites (roughly 5 to 8 a.m. in spring) | Porch and entry lights on timer circuits |
None of these changes require replacing the fixture entirely. A $15 motion sensor adapter and a warm-spectrum LED bulb can change the attractiveness of a fixture dramatically. Combined with physical deterrents, lighting adjustments give you two independent lines of defense. To learn how to keep bird nest away, use these lighting changes alongside physical barriers so the fixture becomes a lot less inviting. You can then further protect nests from predators by combining lighting changes with physical barriers and enclosure that blocks landing and entry points.
When and how to remove or manage nests legally and ethically
The legal framework in plain language
In the U.S., the Migratory Bird Treaty Act protects most wild birds, their nests, and their eggs. The USFWS is clear: removing or destroying an active nest (one with eggs, nestlings, or viable eggs) requires a federal permit. The USFWS also states that inactive nests, meaning nests with no eggs or chicks and no longer in active breeding use, do not require a permit to remove. Canada's Migratory Birds Regulations 2022 carry essentially the same restriction: it is unlawful to disturb, destroy, remove, or take a nest when a live bird or viable egg is present, with very limited exceptions that require permits. Some states have additional protections with specific critical-period windows extending beyond federal minimums, so it's worth checking your state fish and wildlife agency website for local rules.
The practical removal process
- Confirm the nest is inactive: no eggs, no chicks, no adult birds returning over at least 48 to 72 hours of observation.
- Photograph the nest in place before removal. Date-stamp the photo. This is your documentation if questions arise later.
- Wear gloves. Nesting material can carry mites, lice, and bacteria.
- Remove the nest material completely, including any debris that has fallen onto the fixture or into the housing.
- Clean the fixture surface with a diluted bleach solution (1 part bleach to 9 parts water) and let it dry fully before reinstalling or proofing.
- Install your physical deterrent or exclusion barrier immediately, before the next dawn. Birds can start scouting rebuilt nest sites within hours.
Who to contact if you're unsure
If the situation feels ambiguous, like if you're not sure whether a nest is truly inactive, whether your planned actions fall under the MBTA's take provisions, or if you've found an injured bird associated with the nest, contact your regional USFWS Ecological Services field office (in the U.S.) or Environment and Climate Change Canada (in Canada). Licensed wildlife rehabilitators can also advise on nest-specific questions and can take in injured or orphaned nestlings if removal becomes necessary under permitted circumstances. Your state or provincial wildlife agency is another fast resource, especially for state-specific permit questions.
Seasonal prevention plan and monitoring checklist
The best time to prevent nesting on light fixtures is before birds start looking. Spring nest-building typically begins between late February and early April depending on your region and species, with some pairs scouting locations weeks before they start collecting material. Getting your deterrents and proofing in place by late February gives you a clean buffer. Here's a practical calendar to work from.
| Timing | Action |
|---|---|
| Late January to mid-February | Inspect all exterior light fixtures for old inactive nests from the previous season. Remove them now while it's legally and practically simple. |
| Mid-February | Install or refresh spike strips, baffles, and exclusion netting before birds begin scouting. Seal any gaps behind fixture back plates with outdoor silicone. |
| Late February to March | Switch to warm-spectrum LED bulbs and install motion sensors or timer controls on high-risk fixtures. Check that all deterrents are secure after winter weather. |
| April through July (active nesting season) | Monitor fixtures weekly. If a nest appears, immediately determine active vs. inactive status. Document with dated photos. Do not disturb active nests. |
| August to September | After fledging season winds down, do a full post-season inspection. Note which fixtures were targeted and prioritize proofing improvements before winter. |
| October to January (off-season) | Repair or upgrade any deterrents that failed. Replace worn netting or rusted hardware. Plan any fixture modifications (shielding, hoods, relocation) for the following season. |
Quick monitoring checklist for each fixture
- Date of last inspection noted (use a simple notebook or phone note)
- Any new nesting material present? (even a few twigs signals early activity)
- Adult birds observed visiting the fixture in the last 48 hours?
- Eggs or chicks visible? (if yes: do not disturb, note date, plan removal after nest goes inactive)
- Deterrents intact and in original position? (check spike strips for displacement, netting for tears)
- Fixture gaps sealed with no new cracks or separations from seasonal movement?
- Lighting changes still in effect? (motion sensors, timer, bulb not swapped out by a family member)
Repeat nesting on the same fixture almost always means either the deterrent failed physically or there's still a surface or gap available that wasn't addressed. Go back to your checklist, identify which step was missed, and fix it before the next nesting attempt gets underway. Birds are persistent, but so is a well-proofed fixture. A combination of physical exclusion, lighting adjustments, and consistent early-season monitoring will solve this for the long term without putting any bird at risk.
FAQ
Can I remove a nest right away if it looks abandoned?
No. If you see eggs, live chicks, or an adult incubating, treat the nest as active and delay removal until it is inactive. If you must be nearby for safety (for example, the fixture is sparking), focus on making the area safe without directly handling the nest, then address proofing only after the nesting activity stops.
What should I do if I cannot tell whether the nest is active or inactive?
If you cannot confirm activity status safely, assume it is active and monitor. A practical approach is to observe from a distance twice per day (morning and evening) for several days, then use a dated photo each time you check. Consistent adult return indicates active nesting.
Is it okay to use a ladder or touch the fixture while a nest is present?
Do not climb to remove material if the nest is under an eave or near wiring that could be energized. Instead, keep your distance and plan for exclusion and proofing after inactivity. If you need to work on the fixture itself, turn off power at the breaker first and verify the fixture is safe before touching anything.
Where exactly should I place spike strips or gel pads if a nest is there?
You generally should not put deterrents on or inside the nest while birds are using it. Apply spikes, gel pads, guards, or reflective tape to the fixture surfaces the birds land on (ledges, top rims, and nearby edges), and keep it outside the nest cavity. That way you discourage landing without disturbing eggs or chicks.
Do motion-activated lights and timers actually work, or will motion shutoffs just confuse birds?
Motion sensors can help, but avoid making the light come on continuously all night. A better pattern is lower constant illumination with short bursts at motion, or using timers to limit dusk-to-midnight exposure. The goal is to reduce sustained brightness at the nest-site cavity.
Will switching to a different bulb color completely solve repeat nesting?
Yes, but only if you also proof the entry points. Birds often return to the same cavity if a route and landing zone still exist. Changing bulbs alone can reduce repeat nesting, but it rarely fixes recurring mess unless you seal gaps and remove landing surfaces the birds can use.
Why does the article recommend avoiding chemical or scent-based bird repellents?
Many “bird repellent” chemicals and scent products are either ineffective outdoors or can leave residue that attracts or exposes other wildlife. If you want a non-damaging approach, stick to physical deterrents (spikes, guards), exclusion netting, and lighting changes rather than sprays or gels marketed as repellents.
How do I stop birds from nesting behind the fixture back plate?
Yes. If birds are nesting in the gap between the back plate and the wall, sealing that gap with outdoor-rated silicone caulk or closing it with a barrier approach prevents re-entry. Do the sealing after the nest is inactive, and leave any ventilation-required openings alone.
How long do decoys and reflective tape typically keep birds away?
Reflective tape and decoy items can lose effectiveness as birds habituate. Move decoys every few days, rehang reflective material so it flutters, and plan to replace temporary measures with permanent exclusion (spikes, guards, or netting) before the next nesting attempt.
What if I find an injured bird near the nest on a light fixture?
If a bird is injured or orphaned, prioritize humane care instead of removal. Contact a licensed wildlife rehabilitator or your local wildlife agency for guidance. Only proceed with removal if a permitted, legally allowed process is confirmed, and never handle an active nest without authorization.
What are the most common places people miss when proofing a light fixture?
Check the full perimeter, not just the visible ledge. Common overlooked spots include conduit entry points, decorative trim gaps, seams in the fixture housing, and the underside of eave edges where a bird can perch and then slip into a cavity.
What should I do if birds build on the same fixture again next season?
If the next nesting attempt happens soon, treat it as a proofing failure and update your plan. The most common causes are missed landing surfaces, an unsealed gap, or deterrents that were installed only on one side of a cavity. Reinspect with photos and fix the exact entry or landing point that remains available.
Next Article
Do Bird Nests Attract Snakes? Signs and Prevention Tips
Find out if bird nests attract snakes, how to spot signs fast, and prevention steps that protect birds safely.