You can protect an active bird nest from rain by creating a simple, non-touching overhead shield, like a piece of untreated wood, a cut plastic bottle bottom, or a positioned pot saucer anchored a few inches above the nest. The key rule is that nothing touches the nest, nothing blocks the parents' flight path in or out, and you never move the nest itself. Done right, a rain shield reduces direct downpour and wind-driven moisture without disturbing the birds at all.
How to Protect a Bird Nest From Rain Safely

Maya Bennett
4 May 2026
First, confirm it's an active nest and size up the situation

Before you do anything, spend 20 to 30 minutes watching from at least 30 feet away, using binoculars if you have them. You're looking for any adult bird approaching, departing, or sitting on the nest. Don't judge activity based on a single glance: during the egg-laying phase, a female may visit only once per day to lay an egg, and during incubation she may sit so still you miss her entirely. What you're confirming is that the nest is currently in use, not abandoned.
A truly abandoned nest usually shows obvious signs: eggs that are cold, cracked, or have been sitting exposed for more than two weeks without any adult presence at any time of day. If you're genuinely unsure, check back at different times (morning and late afternoon tend to be most active). Until you're confident the nest is inactive, treat it as active. Under the Migratory Bird Treaty Act, destroying or significantly disturbing a nest that contains eggs or dependent chicks is illegal without a federal permit. That legal line shapes every decision you make from here.
While you're watching, also note the nest type and location. An open-cup nest sitting in a shrub fork is far more vulnerable to direct rainfall than a cavity nest inside a tree hollow or an enclosed nest box. The nest's position relative to overhead cover (a branch canopy, roof overhang, or fence structure) tells you how much natural protection already exists and how much you actually need to add.
Rain-proofing options that won't disturb the birds
The guiding principle here is that your shelter sits above or beside the nest, never over or around it in a way that traps heat or moisture, and never in a way that requires you to touch the nest or its supporting branch. Think of it as building a tiny roof, not a cover.
Overhead shield (the most versatile approach)
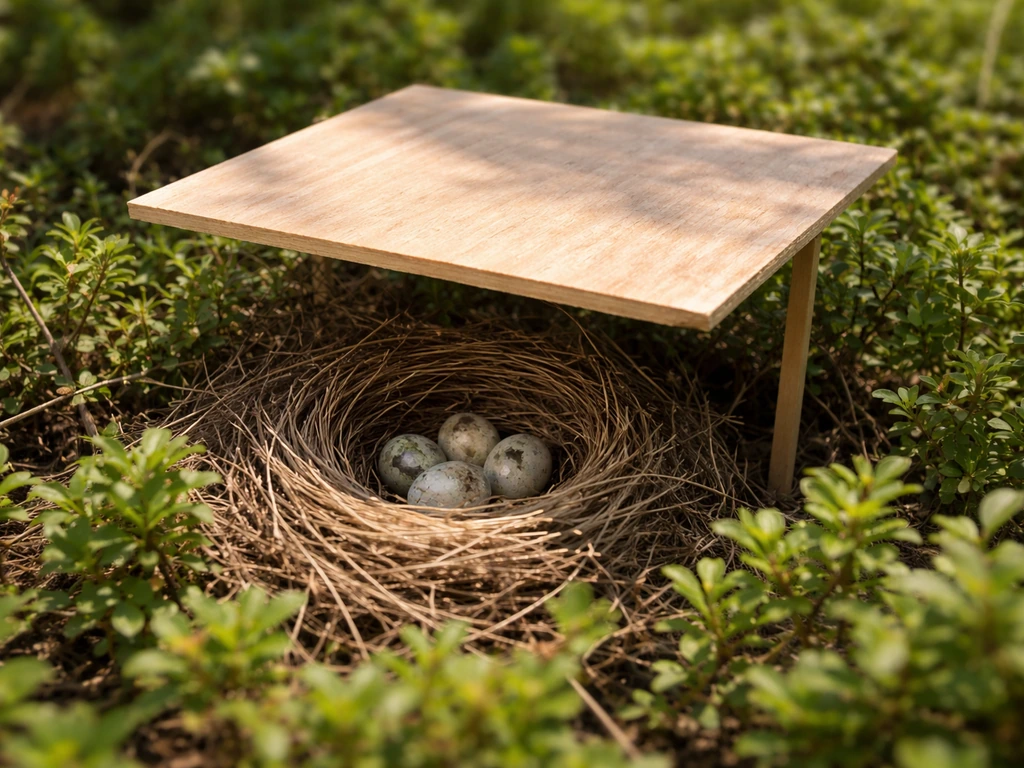
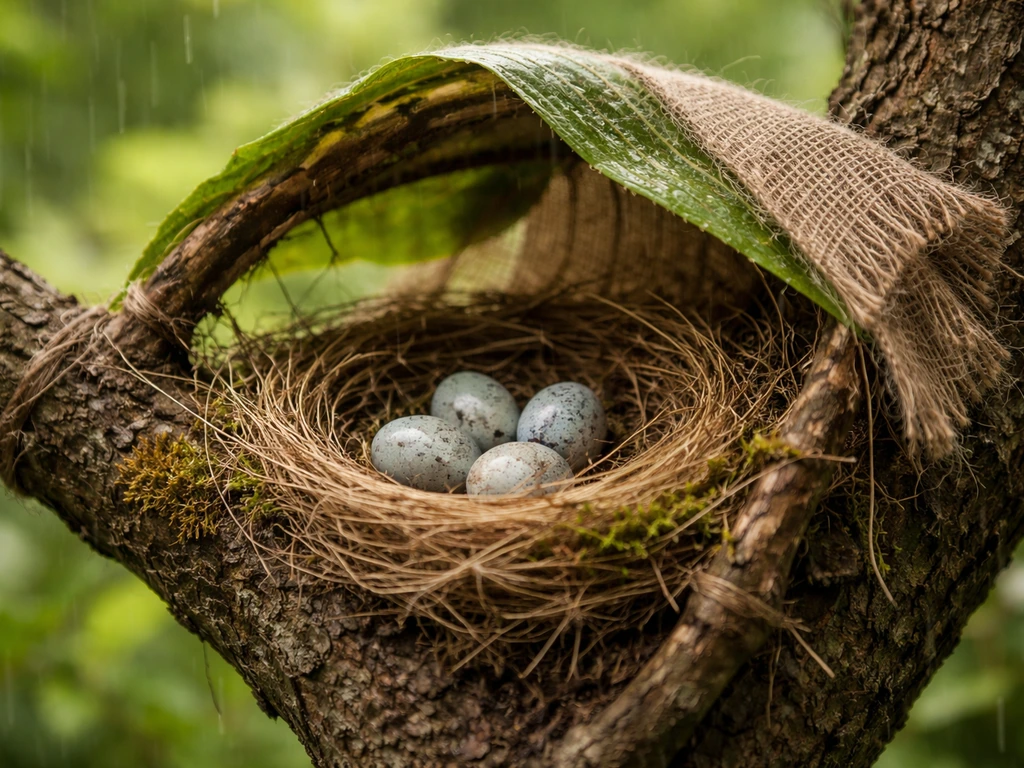
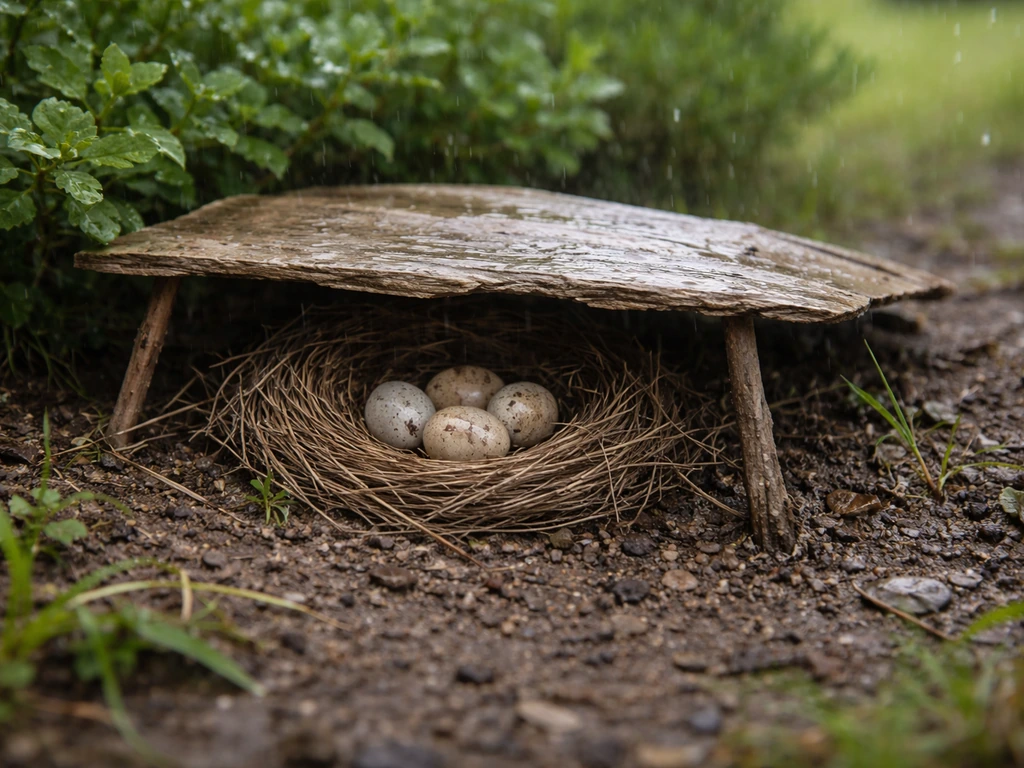
For nests in shrubs, low trees, or on ledges, a small angled board or rigid piece of untreated plywood (roughly 8 to 12 inches square) fastened to a stake or branch above the nest works well. Angle it about 20 to 30 degrees so water runs off to one side rather than pooling. The bottom edge of your shield should sit at least 4 to 6 inches above the top of the nest to keep airflow open. Don't close in the sides; a full enclosure traps heat, which is just as dangerous to chicks as rain.
Side shield for wind-driven rain
When rain consistently comes in at an angle from one direction, a vertical side shield helps more than a roof. Attach a single piece of rigid, untreated cardboard (as a temporary fix) or thin plywood on the windward side, anchored to the nearby branch or stake, leaving the entry side fully open. Check that the birds still fly in and out without hesitation after you install it. If they hesitate or alarm-call near the shield, take it down and try a smaller version.
Using natural canopy and existing structure
Sometimes the simplest fix is redirecting a nearby branch to create better overhead cover. If there's a leafy branch 8 to 12 inches above the nest, you can carefully (and briefly) bend and loosely tie it in a more protective position using soft garden tape, never wire. Make sure the branch springs back if the tape is removed, and confirm parents continue normal visits within an hour. Existing structures like roof overhangs, fence caps, or porch railings can also be used as anchor points for a small shield with minimal disturbance.
Nest-safe materials and how to install them correctly
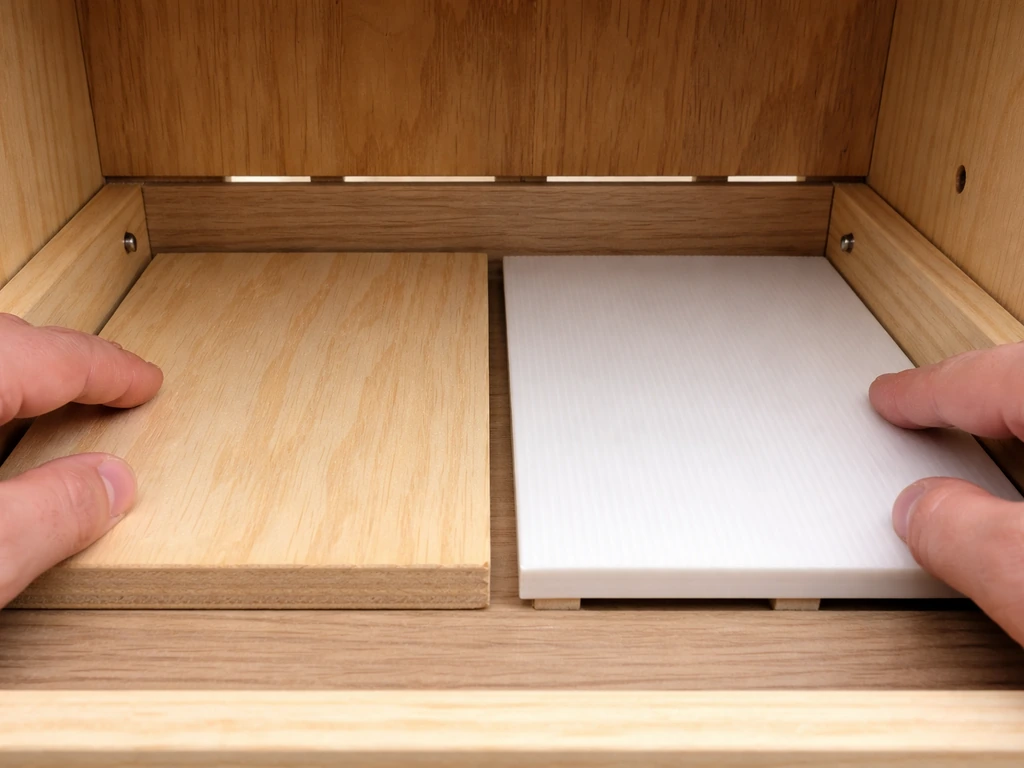
Material choice matters more than most people realize. The wrong covering can make the situation worse by trapping moisture, heating the nest, or tangling chicks.
| Material | Safe to use? | Notes |
|---|---|---|
| Untreated plywood or pine board | Yes | Lightweight, easy to cut and angle; use a piece 8–12 inches square minimum |
| Rigid plastic (like a cut bottle or pot saucer) | Yes | Good for small nests; must be angled and not sealed around the edges |
| Natural bark or slate tile | Yes | Blends in visually; heavy enough to stay put in wind if secured |
| Soft garden tie tape | Yes | For securing shields to branches; stretches and won't cut bark |
| Plastic tarp or sheeting | No | Traps dampness and heat underneath; creates condensation |
| Aluminum foil or metal sheets | No | Conducts heat; can overheat eggs or chicks |
| Loose yarn, string, or dryer lint | No | Entanglement risk for chicks; dryer lint collapses when wet |
| Treated lumber or painted wood | No | Fumes and chemicals are toxic to birds and eggs |
| Spray sealants or waterproofing chemicals | No | Direct toxic exposure risk to birds and eggs |
When installing any shield, work quickly and calmly. Aim for under two minutes near the nest. Don't linger, don't make sudden movements, and don't make noise. Attach the shield to a branch, stake, or nearby structure, not to the nest itself. After installation, back away immediately and watch from a distance for at least 15 minutes. If the parent birds return to normal behavior (approaching and entering the nest), the shield is working. If they stay away or call in alarm, remove the shield and reconsider the approach.
For enclosed nest boxes that are taking on water through the entry hole, check first whether the box has drainage holes in the floor (ideally 3/8 to 1/2 inch diameter). If it doesn't, and you're able to safely access the box between adult visits, adding small drainage holes to the floor is one of the most effective fixes. You can also re-angle the box slightly forward (5 to 10 degrees) so water doesn't pool inside, as long as doing so doesn't dislodge the box violently.
What not to do: the common fixes that cause real harm
Well-meaning people cause more nest failures through bad interventions than through inaction. It can also help to understand how do bird nests stay together, since strong structure affects how much rain-proofing you need and what materials are safe to place nearby. Here's what to stay away from. If you want to keep birds from settling somewhere you cannot support, focus on safe, legal prevention methods for how to keep bird nest away.
- Don't cover the nest with a tarp, plastic bag, or any material that seals over it. Plastic traps condensation underneath, creating a damp microclimate that's often worse than the rain itself.
- Don't move the nest, even a few inches. Eggs can crack from being jostled, and moving the nest to a 'better' spot can mean parents no longer recognize it. NestWatch is explicit: active nests should not be relocated.
- Don't add nesting material, lining, or any substance to the nest bowl. Even well-intentioned additions can introduce bacteria, pests, or materials chicks can get tangled in.
- Don't apply waterproofing sprays, sealants, or any chemical near the nest. Fumes alone can be lethal to developing embryos.
- Don't block the entry path. Any shield that forces the parent birds to change their approach angle or squeeze through a gap will increase stress and may cause abandonment.
- Don't check on the nest constantly. Every close approach is a disturbance. Limit yourself to brief checks from a distance and, at most, one close installation visit.
- Don't confuse 'protecting' with 'preserving for display.' If a nest is active, your only goal is keeping the birds safe. Preservation and display are only appropriate after the nest is completely inactive and legally handled.
Special cases: what to do based on nest type and location
Open-cup nests in trees or shrubs
These are the most vulnerable to direct rainfall. An overhead shield anchored to a branch 6 to 8 inches above the nest is usually the right call. Prioritize a shield wide enough to cover the nest bowl completely (most open-cup nests are 3 to 5 inches in diameter, so an 8-inch shield gives you good margin). Leave the sides open. If the nest is already partially sheltered by leaves, assess how much cover the natural canopy actually provides during a downpour before adding anything artificial.
Ground nests
Ground nests (like those of killdeer, many sparrows, and waterfowl) are a more complex situation. The birds chose that spot, often specifically because of drainage and surrounding vegetation. A shield staked 8 to 10 inches above the nest using a piece of plywood or rigid board supported by two thin garden stakes can work, but only if you can do it without trampling the area around the nest. Walk in from one direction only, minimize your footprint, and watch that your structure doesn't create a wind scoop that funnels rain directly into the nest from the side. Improving drainage around the base (gently redirecting nearby runoff with a shallow trench or redirecting a garden hose away from the area) is often more effective and less disruptive than building a roof.
Nest boxes and enclosed cavity nests
Enclosed nest boxes usually handle rain better than open-cup nests, but problems arise when the entry hole faces directly into prevailing wind and rain, or when the box lacks a proper roof overhang. If you can safely rotate the box so the entry hole faces away from the dominant rain direction (east or southeast is usually drier in most of North America), do so between adult visits, working quickly. Extending the roof overhang with a small strip of wood glued or screwed to the front edge adds meaningful protection without disturbing the nest inside.
Nests on porches, gutters, and building ledges
These locations sometimes offer existing overhead cover, but gutters present a specific flooding risk: if the gutter backs up or overflows, the nest can be inundated from above. Clear the gutter on either side of the nest (without touching the nest section) to improve drainage flow. For porch nests on beams or ledges, the existing roof usually provides enough cover; the bigger problem is often wind-driven rain from an open side. A temporary side board or even a temporarily repositioned patio chair can deflect that lateral rain without bothering the nest at all. These situations often overlap with nest-location conflicts, which is a separate consideration from rain protection.
Nests in unusual or exposed spots
Sometimes birds choose locations that seem genuinely ill-suited: a flower pot on an open windowsill, a hanging basket with no overhang, a fence post cap in a rain-exposed corner. In these cases, you may be able to move the pot or basket to a covered area nearby before eggs are laid. Once eggs are present, relocating the nest is no longer appropriate. NestWatch (Cornell Lab) also advises treating nest relocation as inappropriate once eggs are present and focusing on shelter in place or waiting out the weather instead NestWatch advises avoiding nest relocation once eggs are present. At that point, your only options are adding shelter in place or waiting out the weather. A temporary awning made from a rigid board propped and angled over the container can work, as long as it's secured and doesn't risk falling onto the nest.
Monitoring during storms and knowing when to call for help
During heavy rain, monitor from a window or with binoculars from at least 30 feet away. You're watching for whether the parent bird is still on the nest (incubating parents will often sit tight through rain, and that's actually protective: their bodies shed water and keep eggs warm). What you're looking for as warning signs is an empty, flooded nest, or chicks that have fallen out and are visibly wet and cold on the ground.
If you see a nestling that has fallen from the nest and is cold or wet, that does qualify as an emergency. If the chick is featherless or has only pin feathers, it needs to go back into the nest as quickly as possible; the old myth about parents rejecting touched chicks is false. Gently place it back and step away immediately. If the nest itself has been destroyed or washed away in a storm, you can create a substitute nest from a small basket or plastic container with drainage holes punched in the bottom, lined with dry grass, and secured to the original branch or nearby location. Parents will often accept a substitute if it's close to the original spot.
Know when to escalate. If chicks appear injured, hypothermic (cold and limp), or the nest has been completely destroyed and parents haven't returned within two hours of the storm clearing, contact your local wildlife rehabilitator. In the U.S., you can find licensed rehabilitators through the National Wildlife Rehabilitators Association or your state wildlife agency. Your local Audubon chapter is also a practical first call for guidance on whether intervention is warranted. Do not attempt to raise or house chicks yourself without a permit; that's also covered under the MBTA.
Document what you observe. Take photos of the nest condition before and after the storm, note the date and time you last saw adult birds, and record whether chicks are present and how old they appear to be (featherless, pin feathers, or fully feathered). This information is exactly what a wildlife rehabilitator or your state wildlife office will ask for, and having it ready speeds up getting the right help.
After the rain: cleanup, next-season prep, and what to do with the old nest
Once nesting is completely over, meaning the young have fledged and adults have stopped visiting for at least two weeks, you can remove any temporary shelter structures you installed. If predators are an issue at the same site, you can also plan predator-focused protection so you do not have to handle the nest while it is active remove any temporary shelter structures. At that point you can also assess the nest itself. A nest that was waterlogged may have developed mold, which can harbor parasites. Do bird nests attract snakes because old, waterlogged nests can create a sheltered environment that may bring in reptiles looking for warmth or cover. Many wildlife agencies and nest-box programs recommend cleaning out old nests from boxes at the end of each season for exactly this reason: it gives the next occupants a clean start and removes parasite loads. Scrub the box interior with a diluted bleach solution (one part bleach to nine parts water), rinse thoroughly, and let it dry completely before closing it up for winter.
For natural nests in trees or shrubs, leave them in place unless they're structurally unsafe. Many birds return to the same general area the following year and may even refurbish an old nest. Removing them unnecessarily eliminates a resource.
For next season, do your rain-proofing before nesting begins. This means installing roof overhangs on nest boxes in late winter, clearing gutters near common nesting areas in early spring, and identifying any exposed locations where birds have nested before so you can address the site's drainage or shelter before eggs appear. If birds are building near outdoor fixtures, the same principles help, so you can keep nests off light fixtures by improving nearby shelter and blocking access. To help keep snakes away from bird nests, focus on making the nest area harder to reach and improving barriers and yard management before birds start nesting. A 10-minute walk around your property in February or March is worth more than emergency interventions in May.
If you find a beautiful abandoned nest and want to keep or display it, check your state and local rules first. In the U.S., the MBTA technically covers possession of nest materials from migratory bird species, and rules vary. As a general guideline, nests that fell naturally (in a storm or after seasonal leaf drop) and are clearly no longer active are the lowest-risk category for casual display. Nests removed from a building or structure you own typically involve fewer legal complications than nests collected from wild trees. When in doubt, photograph the nest in place and leave it. For similar reasons, r/Ornithology discussions caution that relocating or removing an active nest can be problematic and may be illegal, so it is usually best to leave it undisturbed When in doubt, photograph the nest in place and leave it.. Protecting a nest during its active life is the goal here; preservation for display is a separate conversation, and one worth approaching carefully.
FAQ
How close can I place a rain shield to an active bird nest without harming the birds?
For an active nest, the shield should be “above and open,” not “around and tight.” Aim for a roof-like cover with the entry side fully unobstructed, and keep the bottom edge several inches above the nest so air can move. Avoid any plan where the birds must squeeze through the sides or where the nest gets trapped in a warm, damp pocket.
What materials should I avoid when I’m trying to protect a bird nest from rain?
Do not use tape, glue, or wire near the nest or supporting branch, and avoid materials that can snag feet or wings (netting, screen with loose edges, or stringy plastic). If you need temporary anchoring, tie or brace to a nearby branch or stake with soft, removable ties, then confirm adults continue normal in-and-out visits within about an hour.
What should I do if I cannot tell whether the nest is active?
If you cannot confirm the nest is active, treat it as active and choose the least intrusive option, usually a small overhead cover that does not touch the nest or block flight paths. If you still cannot determine activity after checking at different times, it is safer to delay installing anything and instead focus on improving nearby drainage or using existing overhead cover.
What are the signs my rain protection setup is disturbing the birds?
If the parents alarm-call, hesitate to land, or stop visiting after you install a shield, remove it and try a smaller, lighter version that provides less interference. Also re-check spacing, because many failures come from shields that sit too low or accidentally block the approach path rather than from the rain itself.
What’s the best approach if wind-driven rain hits the nest at an angle?
In heavy winds, a roof-only shield can worsen things by channeling water sideways onto the nest. If rain comes from one direction, use a single windward side deflector (vertical board or rigid piece) while keeping the entry route open, then observe from 30 feet away to confirm the birds resume normal behavior.
Can I move a nest to a more covered spot to protect it from rain?
If the nest is on a porch post cap, in a hanging container, or on an exposed ledge, shifting the container before eggs are laid can help, but once eggs are present, relocating the nest is inappropriate. At that point, use an angled, secured awning style cover over the container, with no risk of falling onto the nest, and keep it out of the birds’ entry route.
When should I stop trying to shelter the nest and call a wildlife rehabilitator?
After a storm, check for emergency conditions: chicks that have fallen out and are wet or cold on the ground, especially if they are featherless or only pin-feathered. If a nest is destroyed or parents do not return within about two hours after weather clears, contact a licensed wildlife rehabilitator rather than continuing to adjust protection.
How do I know whether adding drainage holes in a nest box will really help with rain?
For nest boxes, drainage holes are only helpful if water actually has a path to leave the box. If you add or enlarge holes, make sure you are not weakening the box structure, and confirm the entry hole is not directly facing the prevailing wind and rain. A roof overhang extension often provides protection without changing the interior.
If a storm destroys the nest, what makes a good substitute nest for rain protection purposes?
If you install a substitute nest after washout, it needs drainage and must be placed immediately so conditions are not prolonged. Use a dry, safe lining such as dry grass (not wet bedding), punch drainage in the bottom of the container, and secure it close to the original spot so parents can find it quickly.
When is it safe to remove rain shelters and clean nest areas after nesting season?
After nesting ends (young have fledged and there has been no adult activity for at least two weeks), remove temporary shelters and then consider cleaning and assessing the site. For boxes, a seasonal clean helps reduce parasite buildup, but you should avoid cleaning during active use because disturbance can reduce breeding success.
Next Article
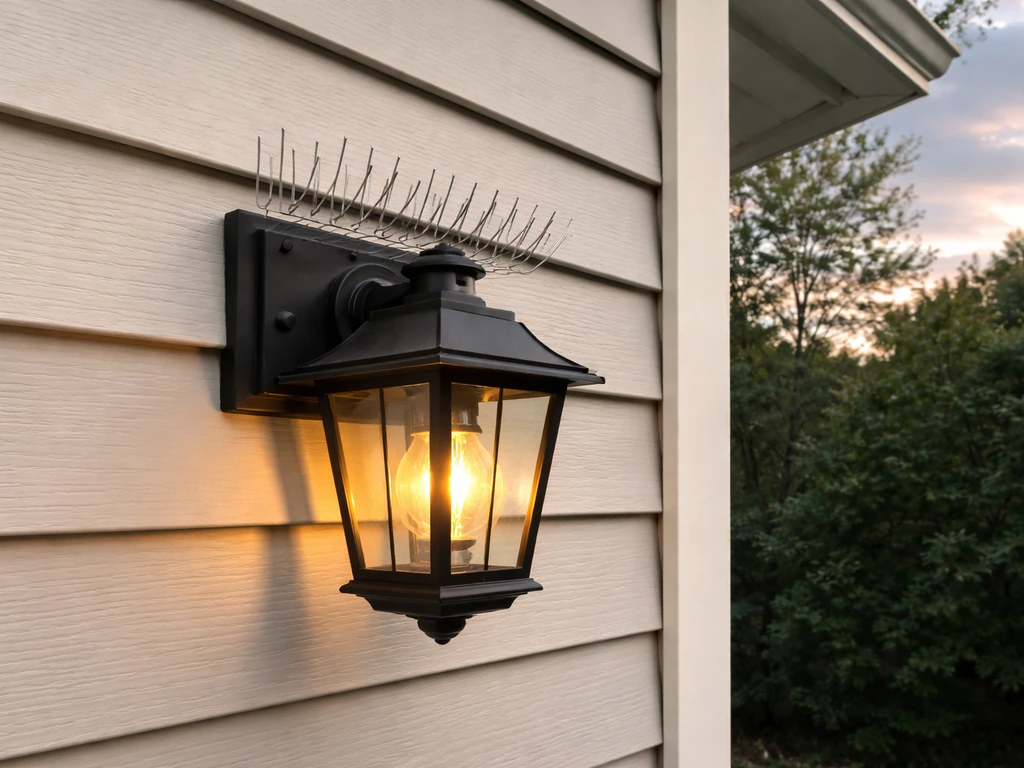
How to Keep Bird Nests Off Light Fixtures Safely
Humane, legal steps to stop birds nesting on exterior light fixtures using safe deterrents, proofing, and lighting tweak